Happy Holidays!

December 17, 2022: Hi all. I'm still here, just been very busy (who of us is not?) I'm working on updating Maison Newton bit by bit, it's been awhile since I changed things up. Happy Holidays to all, soon the Winter Solstice will arrive and then the days will start to get longer once again, hooray!

Sunday, September 16, 2012

Wedding Pictures

Some photos from my niece's wedding:

My sister Debbie, Heather, Randy
Bride's brother Ken, Mom (Grandma Newton), Grandma Varble
Half of me and jokester of the family, brother
Jeff, with baby doll
Great-niece Taylor, princess in training

Great-nephew Austin and nephew-in-law John

 
Heather, her best friend maid of honor,
great-niece Milena and daughter of maid of honor
(I don't remember their names!)

 
Great-nephews Matty and Austin 

Heather and Jim

My sister Debbie

Great-niece Milena
Heather and Jim
Wedding cake

Bride's father Randy, my sister Debbie, Mom, Heather's
big brother Ken behind Debbie and Mom
 
Jim's Dad, Jim, Jim's Mom

Saturday, September 15, 2012

Fall Mantle!

Debbie Dabble is my inspiration.  I wouldn't have done this, except for Debbie.

Getting Ready for Fall
September 6, 2012

I did a half-joking post at her blog recently about all the "fall" and "autumn" mantles I was seeing in the blogosphere, and wrote that I would throw some half-rotted leaves, the old piece of half-rotted wood I rescued from the yard earlier this year, and a few other things, to put together an autumnal-themed mantle.

LOL!

I did so - but I left out the rotted leaves.  For now, anyway.

After I did my "fall mantle" thing earlier today, I visited Debbie's blog again just a few moments ago while sipping some wine out on my deck, sprinkler going (we're still in a drought here in southeastern Milwaukee County, Wisconsin), and she has lots of pretty pictures of her autumnal decorations around her beautiful abode.  Debbie doesn't hold back when she decorates for the seasons, and best of all, she has the full support of her husband in doing so.  I also appreciate her choice of background music (Diana Krall "When Autumn Leaves Start to Fall" playing right now, sigh).  Thanks Debbie, I needed that.

Autumn In the Living Room
September 12, 2012

So, darlings, here's my version of the Autumnal Mantle, TA DA!


Look!  I caught the Goddess holding the Moom above Her head looking back at me in the mirror!  Like, WOW!

Mantle components:

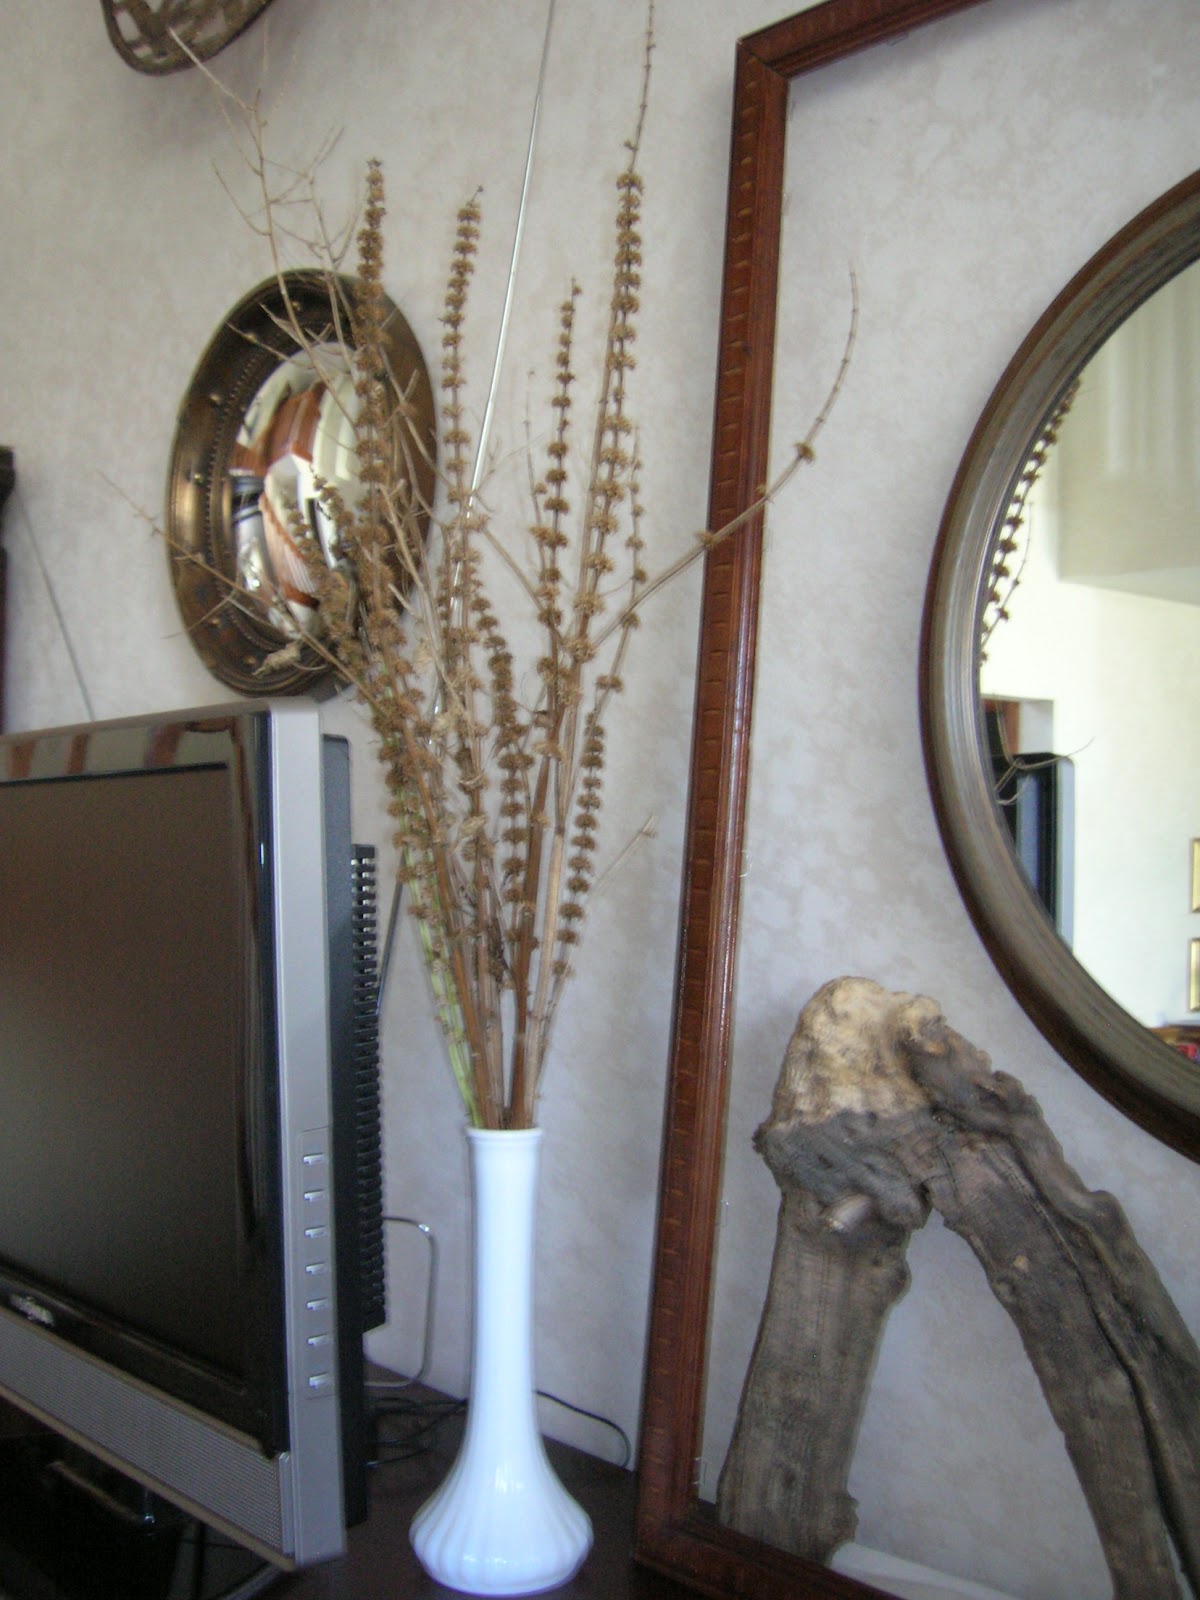
  • The bare frame and round mirrors and metal basket-weave sculpture were already up; also existing components are the plant, the little leopard print-shade lamp behind the t.v. and the t.v. itself
  • Metal candlestick and Goddess swirl-sculpted candle already owned (borrowed from my front room desk)
  • Owl, one of a pair gifted to me by one of my sisters (Darlene) years ago, spray painted white (turned out cream because the spray paint was so old and/or due to the original fire-glazed brown finish on the owls).  I toyed around with putting both owls on the mantle but couldn't get the balance to work. 
  • Floral "sprays" are clipped from my backyard earlier today -- seed pods on tall branches and bare branches of I have no idea what kind of wild flowers that have long since gone to seed!  They come back every year, that's all I can tell you.
  • Fluted white vases holding the floral sprays are from the office -- prior years' gifts for "Secretary's Day" stashed away in a cabinet.
  • Wild wood -- it's not exactly "driftwood" since it wasn't found anywhere near a body of water, but it fell down at some point from one of my trees out back and started to rot away.  I found it earlier this summer, cleaned it up, and let it outside to dry. I then sprayed it with clear silicon to seal it.  I would like to mount it (similar to a sculpture on a pin anchored to a base) since it reminds me of a roe's horns that were worshipped as a sign of the Goddess in ancient Iran. The "V" stands for "Victory," who is also a Goddess, and for the female Delta -- our sacred area that leads to the creation of life.
And totally not planned, I managed to capture a photograph of the Goddess herself (in one of Her many manifestations. ahem) holding the Moon above Her head. There She is, in the mirror above my mantle!

P.S. Mantle or Mantel - spelled both ways according to my trusty Webster's Collegiate Dictionary (1974 or so edition). 

I'm linking to The Polohouse: Favorites on the First! Fall Decor
Also linking to Kristen's Creations Party #57, where my mantle will be the plainest Jane!

Bathroom Redo - Part Deux

Hola darlings!

As with every redo, there are some things I would like to change, if I had the budget and/or the time to do the work myself and buy the necessary elements.  Sigh.

My original inspirations for redoing the bath were several rooms I saw at BHG online in black/white/tan and also toile (black/white or black/cream).  I was looking for "toile" bathrooms, because of the toile that I wanted to introduce into my bedroom and the guest bedroom.

The traditional way to get the toile look is by wallpaper.  But I was hesitant to do that in the small space of my bathroom.  Sometimes I'm just too damn conservative!  I should have gone with toile wallpaper.  But -- see my comments below...

While I'm very happy with the look of my bathroom now, it's still missing something that I wanted, and did not quite get.  For instance, check out this inspiration pic:


It's from Just Grand blog - don't have the specific link readily available.  It's not a full bath - it's a powder room, but the look, oh that look!  That is what I wanted.  Unfoartunately, I found this image a couple of years after I set out with my "vision" for the bath redo.  LOL!  Isn't that always the way it goes.

Dealing with reality, such as a white countertop and existing accessories (no beautifully-carved gold colored picture frames, no antique mirrors, no perfect electric light fixtures on either side of the mirror, no gorgeous faucet, and no toile wallpaper), accumulated over time and NO budget to speak of, well, my results speak for themselves.

Realistically, since I was undertaking the bathroom redo just before I listed the house to sell back in November, 2009 (a long horror story), I decided to stick with plain paint rather than toile wallpaper, which a lot of potential buyers might find too overwhelming and not to their taste.  So, I settled for a toile shower curtain which gives me a large swatch of portable toile.  Since I did not sell this house, I am pining away for the toile bathroom.  Now I'm thinking about redoing the powder room (3/4 bath) downstairs in toile...

Wiring light fixtures on either side of a mirror was beyond my budget; I settled for replacing the boxy original (cheap) light fixture above the mirror with a new, elegant profile.  I'm very happy with the new light fixture, which provides plenty of light in this bathroom used daily to put on my make-up and get ready for work in the morning and scrub up in the evening.'

But I really really want to try and duplicate the look of THOSE sconces (photo above) in my own bathroom.  So, I've been looking for candle sconces.  For months.  I found some close - and did not save the link!  Arrrgggghhhhh!  I thought at the time I did not want to spend that much money on them.  But afer shopping around further and not finding anything else like, I decided I wanted them after all.  When will I learn, when will I learn?

So - here are some alternative wall candle sconces that I considered -- and also did not buy (can I get a double ARRRGGHHH?):


I found these at e-bay from an Etsy shop.  They were sold.  Picture these with my black metal candle-shades on either side of the mirror - wouldn't they be splendid?  They are, believe it or not, just painted shabby-chic style plastic Syroco-style candle holders from the 1960s.  Does anyone know where I can get something similar???


I found these at Ruby Lane and thought they also might work, if treated with some white paint.  Picture the thick pillar candles with black shades I have sitting on the vanity countertop in these candle holders, instead, on either side of the mirror.

I have also thought about a different style of shower curtain.  Something "Frenchy style" perhaps (like popular prints I've seen recently all over the blogosphere of French script, cancelled postage stamps and period pictures) or in black and cream or black and white damask print?  But that's assuming I keep the wall color the same rather than going diva dramatic and papering part or all of the room in black and white or black and cream toile.

Oy!  Decisions, decisions.  Right now, I'm suffering design paralysis.  It's only a week or so ago that I added the "finishing touches", as it were, to the room, so that I was happy enough with it to take photos of the room and post them here.  You can see from where I came, to where I am now.  It's been a long slow journey for moi.  Now I want to go at warp speed :)  Not sure I should...

What would you do?  That's a rhetorical question, but I would be interested in receiving your comments, please!

Just because I took tons of them, here are some more photos of my bathroom at present:


This is a close-up of the print hanging underneath the "cubby" to the
linen closet, on the wall opposite the tub/shower enclosure.  When I'm in
the tub soaking in a candle-lit bath, this is the print I see across the rooom.
This pic also gives a pretty good image of the actual wall color -- see --
it's kind of like wet sand or peanut butter (see PRIOR post). 
 
Vanity vignette.

"New" light fixture, installed in October 2009.  OHMYGODDESS!
Three years ago.  Geez, Jan.  Talk about being a slow-poke getting a room done!

Wall opposite vanity wall.  The entry door is on this wall, to the right.
This photo provides another indication of the true wall color vis a vis
the cream and white tones in accessories and the creamy shower/tub surround.
 
Vanity vignette . Okay,  I'm not a good photographer.
You can see my hands in the mirror holding the camera, LOL!
Spots on mirror, too.  Not such a good housekeeper.  Oy!
However, the soap in the hand pump is rich and creamy,
smells sweet and a little goes a LONG way!  Guests who
use this room who aren't familiar with this soap end up in suds...
One last view of the "completed" bath from the door.
I think it's pretty - and it's practically arranged, with stuff strategically
placed inside drawers that I use every morning and every night.
Handy but not much clutter in sight.
Thanks to all of you out there in the blogosphere with organized baths, beautifully appointed, for all the inspiration you've given me.  I'm learning, darlings, I'm learning from all of you.  I really like this final photo I posted above because it shows a reflection of one of the prints on the other side of the rom as well as my print of Leonardo's "Vitruvian Man" that hangs in the hallway outside the bath.  And I managed not to photograph myself or my hands holding camera in it :)

Bathroom Finished!

Hola darlings!

Well, it's as finished as it is going to be unless I find just the right wall candle sconces to go on either side of the mirror. "Before" pics are interpersed.

After.  New items are the mirror and light fixture, and a rearranging of accessories
and "cleaning off clutter" from vanity top.

For the time being, I'm using glass candlesticks with solid black metal shades, silver-colored candle-followers (to tie into my still chrome vanity sink fixtures) and cream-colored candles, which is about as close as I can come to duplicating on the countertop the look I would like on the walls flanking the mirror. 

As I mentioned, this revamp/updating was started in October, 2009.  The room was in dire need!  It had the same tired looking "ANTIQUE WHITE" it had been painted in 1990 when I first moved in.  The paint had held up well but I was sick of it after 19 years. I decided I wanted something deep, dark, dramatic!  Something totally different.

So what did I choose?  A color not too far off from the original Sears Easy Living ANTIQUE WHITE.  LOL!

I call the new color "wet sand" or "peanut butter," but in reality, it is neither - it is too light!  Oh well.  It's a dramatic enough change for me.  I like how the creamy shower surround and the creamy white shower curtain  and the vanity top "pop" against the somewhat darker tone of the walls.  I don't remember what the color is -- I had to take off the paint labels and mail them in for a $5 per can rebate.  It wasn't a stock color, it was mixed from one of those little cards I picked out.

After - interim.  New wall color, new light fixture, new mirror, everything else pretty much the same
except for the addition of some black towels - a new dramatic change for moi!  Old prints/artwork had been
stripped fromj the walls and nothing was installed in its place.  It was a very bare-bones bath, and felt "cold."
This photo was taken in December, 2009!  The photo above was taken a few weeks ago, after I
FINALLY got off my duff and finished accessoring and adding finishing touches.

Before - redo in progress.  New light fixture (a good photo of it, actually), had been installed.  You can see the
vague outlines of the old paint line where the original "box" light fixture had been removed.  Old pics and blah beige
 towels in place, you can see the remains of where the wallpaper border removed, and the old builder's plate glass mirror,
the old wall color, with old accessories, all in place.  B-O-R-I-N-G!
 
CHANGES:

(1)  New vinyl flooring.  The old flooring had, over the years, shrunk away from the walls, revealing the underlayment!  I finally got sick of looking at it!

After. New vinyl flooring, seamless and waterproof.  New movable towel stand - no more
wall mount towel holder on this wall.

(2)  New light fixture (see top and second photos).  The old "box" fixture I had originally purchased was not only cheap, but also dated, a major dust collector, and just plain ugly!  It also used small "hollywood" style light bulbs that are going to be phased out. One of the three lamps had developed a short, too, and no longer lit.  It was time to say adios! 

I purchased the new light fixture on sale at Menards.  It is "oiled bronze" with white glass shades,  It has a smaller profile than the original "box" fixture and provides good light. It's transitional styling fits with many different decorating schemes.  I am very happy with it. 

(3)  Tore off so-1980's colored wallpaper border and scrubbed away all the residue paper backing and glue!  Major work-out for upper body and arms!

Before.  You can see the remains of the old wallpaper border and the blah wall color.  I still really like the shower
curtain, though! (Of course I saved it - never know when you might need another shower curtain...)
 Maybe in its next incarnation, the bathroom will go a dramatic reddish-burgundy wall color and
everything else will be shades of green, with this shower curtain anchoring the whole...

(4) New paint color. (See above).

(5)  New mirror (see photo 3 above).  The builder's standard plate glass mirror.  It would have cost a small fortune to "frame" buying "to-order" glue-one framing online.  I am not equipped nor adequately skilled to attempt such a project by myself as custom-framing myself.  I ended up giving away the plate glass mirror (you cannot SELL them on Craig's List, no takers!) and replaced it with a much smaller, framed, beveled-edge mirror I liked that I bought on clearance at Menard's.  Way less expensive and way less hassle!


After. New mirror, rescued from the "clearance" aisle at Menards.  It's not real wood and not
the most expensive but it serves its purpose and I love the "tortoise shell" finish and
small details like the beading on the inside frame and the beveled edge on the mirror.
The outer trim around the "tortoise shell" is black, so it coordinates beautifully with the
other colors and accessories in the bath.  Oops - smudges on the mirror - me bad.

(6)  New shower curtain.  To tie into the black/white/tan theme I decided to go with in revamping my bedroom and the guest bedroom (I wanted the upstairs to appear "en suite"), and wanting to tie into the black and cream toile curtains and other red/black/white/cream/tan items I had purchased for my bedroom and the guest room, I selected an inexpensive shower curtain in a toile pattern, black on cream.

Before.  Old shower curtain, old chrome tension shower rod, you can see a part of the wallpaper border that
had not yet been removed, and the old blah wall color, along with a much loved butterly print that
I purchased and had framed in the 1970's.  I will find a new place for it, somewhere.  Right now it's stashed in a closet.
There is a distinct contrast now between the color of the walls vis a vis the shower/tub surround and the color
of the shower curtain (see photo below).

(7)  New shower curtain rod.  I had used the utilitarian chrome colored tension shower rod provided by the builder for 19 years!  My new rod was purchased at Penney's online.  It is an "oiled bronze" finish tension rod, so it was very easy to install -- I just balanced it over the old impressions left by the prior rod and turned one end until the rod was tight against the walls.

After. New toile shower curtain and rod.  The pattern is called "Antoinette" and I bought it on
the internet, but I forget from where!  It was under $30.  See how well the color
matches the color of the tub/shower surround.  And this photo also shows the
nice contrast between the wall color and the creamy color of the curtain and surround.
The curtain clips are from TJ Maxx, cost about $3 on clearance.  Tension shower curtain rod
was purchased online at Penney's - oiled bronze finish, it was around $30. 

(8)  New towel holder - floor stand model (see photo above under flooring). After I took down the standard large and old but still in good shape bright brass rod when the room was repainted, I tried to put it back up afterward, miserably failed, and determined to find a different alternative.  I also had to patch over and repaint large holes I left in the wall after my unsuccessful attempts to re-install that towel rod!  I had no problems putting up the old but still in good shape shiny brass towel holders above the toilet or on the wall along the side wall above the vanity in their former places. Doh!

(9)   A few "new" accessories added -- I shopped the house.  Glass candlesticks with candle shades and candle followers were already owned, so were the cream-colored pillar candles. They were added to the room, as was the black marble "pyramid/obelisk" and the glass "oak leaf" votive candle holder from other rooms and my cabinet stash.

(10)  Framed prints.  I purchased the black frames from Walgreens for $5 each over the years as I saw them.  I really like them because of the cream-colored mats and the 5x7 framed inset where the picture sits.  The overall look is smooth, modern and elegant.  The images were printed on photo paper from the internet -- they are black and white prints of both vintage and current scenes from around Paris, France. 

After. Black and white print of the Louvre Museum, from the internet.  In this photo you can see
one of the retained shiny brass towel rods.  Still in good shape, and I was able to reinstall this
one easily after the bathroom was painted.  Did not have any luck re-installing the towel
rod on the opposite rod, that's why I went the route of movable floor towel stand! 
 
After. Black and white print of the Seine, with Notre Dame Cathedral in the distance.  This is
the wall opposite the wall that holds the tub/shower.  The cubby opens to the linen closet
(main door in hallway outside), very convenient for stashing soaps, etc. and reaching in for
an extra towel if needed!  You can also see another of my old shiny brass towel holders.
In too good a condition to replace, and I like it's sparkle.  Marble "obelisk" was purchased
years ago to use as a book-end.  It's waterproof and adds a splash of black.


After. Old black and white photos from internet of the Eifel Tower.  This is the door wall, opposite
the vanity wall. Tub/shower is on the end wall to the left (not seen in photo).   

NOT CHANGED:

(1)  Most towel rods or toilet-paper holder -- still the original shiny brass I installed in 1990.  They are in good shape and everything doesn't have to be matchy-matchy (so I read all the time :))

(2)  Sink faucet fixture (still chrome) or bath/shower fixtures (ditto).  I thought about painting them like some adventurous bloggers have done, but I'm chicken.  Sink fixture will be replaced, coin jar money has been targeted for this purchase, so probably when I cash the money in this December.

(3)  Cabinetry and rich dark cherry finish stayed the same.  I've had the same cabinetry 21 years now and I still love it as much as the day I picked it out. 

(4)  Rugs stayed the same.

(5)  Many accessories stayed the same, including the tissue holder and"shabby chic" metal catch-all (holds an assortment of items I regularly use). Added some new decorative accessories, got rid of clutter, stashing things in the vanity drawers that were reorganized to make more sense to how I actually use things. Other items are stashed in the cabinet beneath the sink, pulled out as needed.  I admit, it takes discipline to put them away again after use instead of just tossing them aside as I run out the door for the bus to work, but the overall clean look is worth the effort!

Saturday, September 8, 2012

5-Ingredient Beef "Burgundy"

Hola darlings!

Today I spent several hours with Mom at her home (she lives alone since Dad passed away in 2002), laughing at some of the people and some of the extremely pricey and unrealistic projects shown on the d-i-y shows on the Home and Garden cable t.v. channel.  I don't have cable in my home, so I don't get all those shows, which is probably a good thing, otherwise I might be glued to the t.v. far too much!

On my weekends is when I "cook" if the mood strikes.  I don't do "fancier" dishes unless Mr. Don is here or I'm entertaining, then I try to get a little more extragavant and exotic (for me).  Today, on the way home from Mom's, the mood to cook struck.  It was a pleasantly cool weather (60F when I left the house, got up to about 70F by the time I got home), a breezy and DRY (air) day, with clouds skudding across a brilliant robin's egg blue sky -- one of those days that is so beautiful you want it to last forever!  It's also the kind of weather that makes people hungry!  I stopped at my Pick 'n Save and picked up (har!) the ingredients for a very easy and yet super-delish recipe -- EASY BEEF BURGUNDY.

Here, I remembered to "get creative" and took a photo of the ingredients on my kitchen counter before I started slicing:


Ingredients:

(1) One pound of sirloin tips, cut into bite size, or do like I do and buy "beef stew" meat and cut into bite size chunks because some of them are very large
(2) 1 can golden mushroom soup (not cream of mushroom - entirely different flavor and not as good)
(3) 1 package instant onion soup mix (for not-so-savvy-cooks like moi, a box contains 2 packages, only 1 is needed and you can use the other one for something else)
(4) 1 soup can full of cheap sweet red (must be red) wine.  The sweeter the better.  A full-bodied burgundy can also be used, which gives a richer flavor, but try to find burgundy wine these days in a supermarket liquor department!  Nearly impossible!
(5) Optional:  4-8 ounces of whole button mushrooms.  If you like mushrooms, use the entire package. Mushrooms ("smaller") around the same size are what I aim for, so I put the larger ones aside for slicing and sauteeing for a steak tomorrow night

That's it, all the ingredients.  All the seasoning you need is in the instant dried soup mix.  You do NOT brown the meat before using!

Directions:

Place meat (cut up as necessary into bite-size pieces) in bottom of casserole dish.
Sprinkle dried soup mix on top of meat.
Add whole mushrooms on top of soup mix.
Spoon out golden mushroom soup on top of mushrooms.
Open cheap sweet red wine, drink a glass, with or without ice in glass.
Poor more wine from bottle into empty soup can until filled, being careful to have the wine-filled can over the casserole dish, swish around  the contents of the can with spoon or fork to get out as much of the left-over soup as possible, and pour over the contents in the casserole dish.
DO NOT STIR.
Cover your casserole dish and put into pre-heated 325 degrees F oven.
Cook for 1 and 1/2 hours.
Don't open oven.  Don't peek.  Trust the process, it really does work!

SOOOOOOOO easy!  NO browning of meat!  NO making of gravy!  NO special seasonings and worrying about doing too much or too little!

About 1 hour into cooking, incredible aromas start to emanate from the oven, where the meat is slowly cooking and browning at the bottom of the casserole, the alcohol in the wine has long since baked off in the oven and its rich sweet flavor is condensing and cooking into the simmering meat and mushrooms, along with the seasonings of the onion soup mix.  Guests and/or Mr. Don start saying oooooh, that smells good!  The low cooking temperature and relatively long cooking time ensures the meat comes out tender and it will be browned and thoroughly cooked.   (For each pound of meat you add, increase other ingredients in proportion and increase cooking time by one hour per pound of meat).

The dish (one pound of meat) is done after 1.5 hours.  Set your oven timer or use an old-fashioned timer, and enjoy doing other things and/or visiting with your guests as the dish cooks. 

The casserole dish will be BUBBLING hot when it comes out of the oven, so set aside, slightly vent the cover, and serve your pre-main course dishes while it is cooling down a little -- usually 10 minutes minimum.  You can take 30 minutes or more if you keep the dish covered, while you chat away with your guests while munching on salad and bread and sipping your drink of choice.  You will be able to judge how long you can set the dish aside before serving by how thick or "thin" the gravy is when you pull it out of the oven.

HOW I SERVE:

Over rice or potatoes (mashed; boiled), or noodles OR dish into a bowl and serve as a stew with crusty bread.  I offer all options at my table, according to my guests' preferences. 

I usually serve a tossed salad of greens with vinagrette dressing (homemade or if you're like me, store-bought) in a big bowl so guests can serve themselves,  and on a plate or tray some olives (black and green), some cucumber slices and tomato slices for guests to take as they please.  I always have salt and pepper shakers on the table, in case people want to add. If I have guests who like bread and butter with their meal (check ahead of time), I have unsalted butter (the only kind I use and much healthier than salt-added or margarine) and serve a crusty Italian or French bread.  This kind of bread is ideal to sop up the gravy from this Beef Burgundy, so it is at hand if I'm serving more than Mr. Don and myself -- we prefer ours either over baked potatoes or on the side.  YUM! 

That's all it takes to make for fine dining at Maison Newton.  I haven't struck out yet with this simple and yet uber-delicious meal. 

I took a photo of what the dish looks like after just being removed from the oven (casserole dish not even cleaned up yet, way too hot!)  Stir it up after removing from oven -- I had not done that yet when I took this pic -- and stir again before serving:


This pic of unstirred dish shows you how much the liquid has reduced, and yet there is plenty to serve 6 people (some with rice or potatoes, some in a bowl as a stew with bread on the side). 

This dish can also be made with carrots without the addition of any liquid(s). I have made it both with cut-up "regular-size" carrots (cut into about 1 inch chunks) and baby carrots (cut carrots in two cross-wise, not length-wise).  Carrots add a sweet flavor layer and also turn it into a more rustic and hearty stew-like dish. 

Either way - YUM! 

If any of my myriad (two?) readers happens to try this dish some day, feed-back would be much welcome!

I am linking this year old plus post to the Throwback Thursday Party at Glue Glitter and Paint!  The dish looks much prettier if you clean up the casserole dish (or put into a fancy dish) before serving, but my guests (and moi) aren't so fussy -- we just dig in and go YUM! 

Monday, September 3, 2012

Powder Rooms and Bathrooms!

Some of these are just so pretty, they make me want to totally redo mine -- and the bath upstairs isn't even finished yet from the last (long-time coming -- started in November, 2009) redo.  Enjoy along with me:

So pretty from Free Stylin':

A Stenciled Bathroom (How to Stencil)
August 24, 2012

Photo from Free-Stylin' blog.

Love the pattern and the color, but I would never have the patience to do this.  Kudos to Beth for hers!  The room was utterly transformed.


Debbie-Dabble's blog never fails to inspire me.  Check out her bathroom transformation using, among other things, double wallpaper borders!  She's a brave woman, flying in the face of convention that currently calls borders a faux pas.  Fie to you, Debbie says!  She does what makes her happy and it works every time.

Check out her blog

I Now Have a Pretty Bathroom!
August 16, 2012

Photo from Debbie-Dabble's blog.
Debbie added a border to both underneath an existing wallpaper border on the lowers walls as well as to the ceiling ("above" the existing wallpaper border) that coordinates beautifully not only with the existing border but also with the material she used to make a valance to add to the shower rod.  She edged the valance in lace and added silk flower arrangements and Home Interiors sconces to the one "free" wall in the bathroom (behind the door) in addition to framed prints. 

Looking at one of Debbie's rooms is like being in another always peaceful, beautiful world...


At Hydrangea Love, I haven't even seen the entirely redone bathroom yet and I'm already loving it, just on the basis of the light fixtures, the wall color, and the shower curtain! 

Chrystal Chandelier for Under $45
August 13, 2012

I've no clear idea of how, exactly, Kirstie did this, but she combined an already-owned "crystal" candle-holder with a light fixture kit she purchased at Home Depot and somehow ended up with this:

From Hydrangea Love
...which she installed herself after removing the old and tres uglee fluorescent light fixture herelf.  Yeah, she does wiring! 

Fashion Night Out 2012

Hola darlings!

I am happy to report that Milwaukee, WI is joining in the 2012 Fashion Night Out Celebrations across the land on September 6, 2012!

I first became acquainted with Fashion Night Out a year ago while visiting St. Louis to attend a meeting of the Chess Collectors International and the Kings v. Queens Chess Tournament at the St. Louis Chess Club in a tres trendy re-gentrified district.  The area of St. Louis in which my gal-pal Isis and I stayed was beautiful, the hotel was uber-swanky (we had a mini-suite at a fab price), we felt like princiesses, and the weather gave us a break in early September by not being TOO hot and humid.  Thanks, St. Louis!  It was there I first read about Fashion Night Out.  I did not have a chance to do any serious shopping while in St. Louis, but now that I know Milwaukee stores in the trendy Third Ward area near downtown will be participating, conveniently after working hours (6-9 p.m.) I will stop by and have some champagne.  Buy something too.  None of my clothes are fitting these days as I've lost 11 pounds since the beginning of June, and although I swore up and down that this weekend I was going to take in a lot of my slacks... Well, it didn't happen.  Sigh.  Didn't even get the grass cut! Mom's health issues and sudden new information from Mom that added new to the family tree kept me fully occupied.  Really, I know I should be more concerned about well-fitting slacks!

I urge you to check and see if there is going to be Fashion Night Out "dos" in your area and to attend and support your local merchants.  Here's the blog from Bon-Ton -- in Milwaukee they operate Boston Store, one of my favorite places to shop, particularly since Gimbels went out of business in the 1980s (I was born and raised to be a loyal Gimbels shopper).  I still miss Gimbels, and I'm glad Boston Store is still around!

For Milwaukee Fashionistas, more information on the doings in the Third Ward after work on September 6th can be found at M Magazine! 

I would love to try on one of those color block dresses that has the black inset panels on the side, a very slenderizing look so I'm told. Check out these two Calvin Klein dresses on sale at fabulous prices at Boston Store right now:
Calvin Klein: $88.99 on sale now at Boston Store!


Calvin Klein, $87.99 on sale now at Boston Store!