Happy Holidays!

December 17, 2022: Hi all. I'm still here, just been very busy (who of us is not?) I'm working on updating Maison Newton bit by bit, it's been awhile since I changed things up. Happy Holidays to all, soon the Winter Solstice will arrive and then the days will start to get longer once again, hooray!
Showing posts with label adding curb appeal. Show all posts

Monday, November 1, 2021

Easy Curb Appeal Added Over Seven Years

 Hola!  I moved into the current Maison Newton in July 2014 and retired in January 2015.  I've been puttering around the front and back yards since I first moved in and slowly making the home my own - hopefully for the better from when I bought it.  

This is a review of what I've done to the front of the house since I moved in to "dress her up" and make her pretty.  It's always so rewarding when I'm out working in the yard and a passerby stops and complements on how pretty my house looks. Other than maintenance yard work (mowing the grass, fertilizing, weeding, trimming shrubs, trees and grass and occasional edging the lawn), the steps I took to add to my home's curb appeal were pretty basic:

1.  Added annual and perennial plants to the garden beds, changed out plants that didn't do well.

2.  Added planters and door mat to front door area.

3.  Used a shepherd's hook to hang a bird house during spring and summer and a lantern with battery operated candle in fall and winter.

4.  Added nice trellis to the front of the house.

5.  Painted front door.

6.  Added shutters to the large picture window.

7.  New larger front porch light fixture.

8.  New larger address plaque.

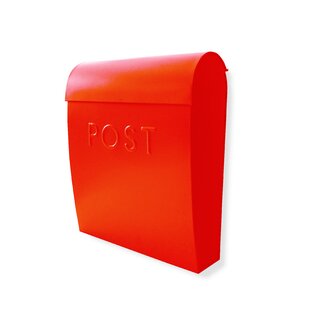
9.  New larger mail box.

10.  Lined front garden beds with concrete blocks.

11.  Added new garden bed (area not shown in photo below) on south side of the driveway - it can be seen from the public sidewalk and added a lot of color and beauty to the yard, as well as replacing a lot of mud-encrusted gravel.

12.  Seasonal plantings here and there, to fill in bare spots and add some color, especially late in the season.

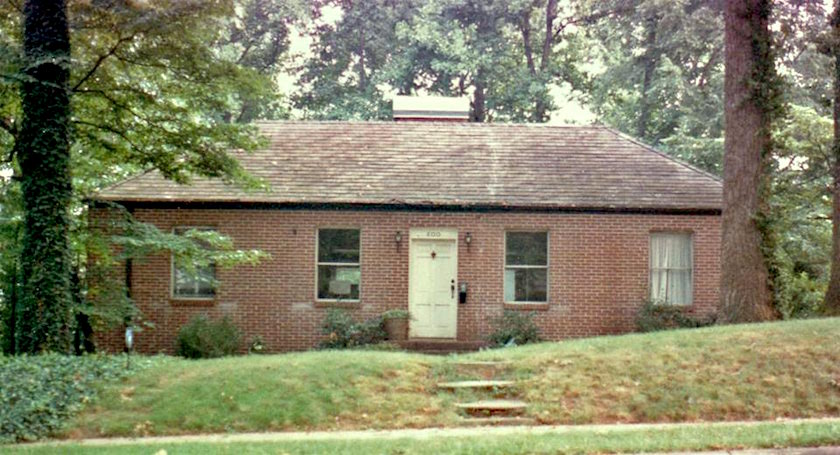
The house was well maintained but plain out front when I bought it, and the shrubs, trees and plants were much smaller than they are now.  Here's a photo of what the house looked like a few months before I bought it (early spring 2014; I bought the house at the end of May 2014):


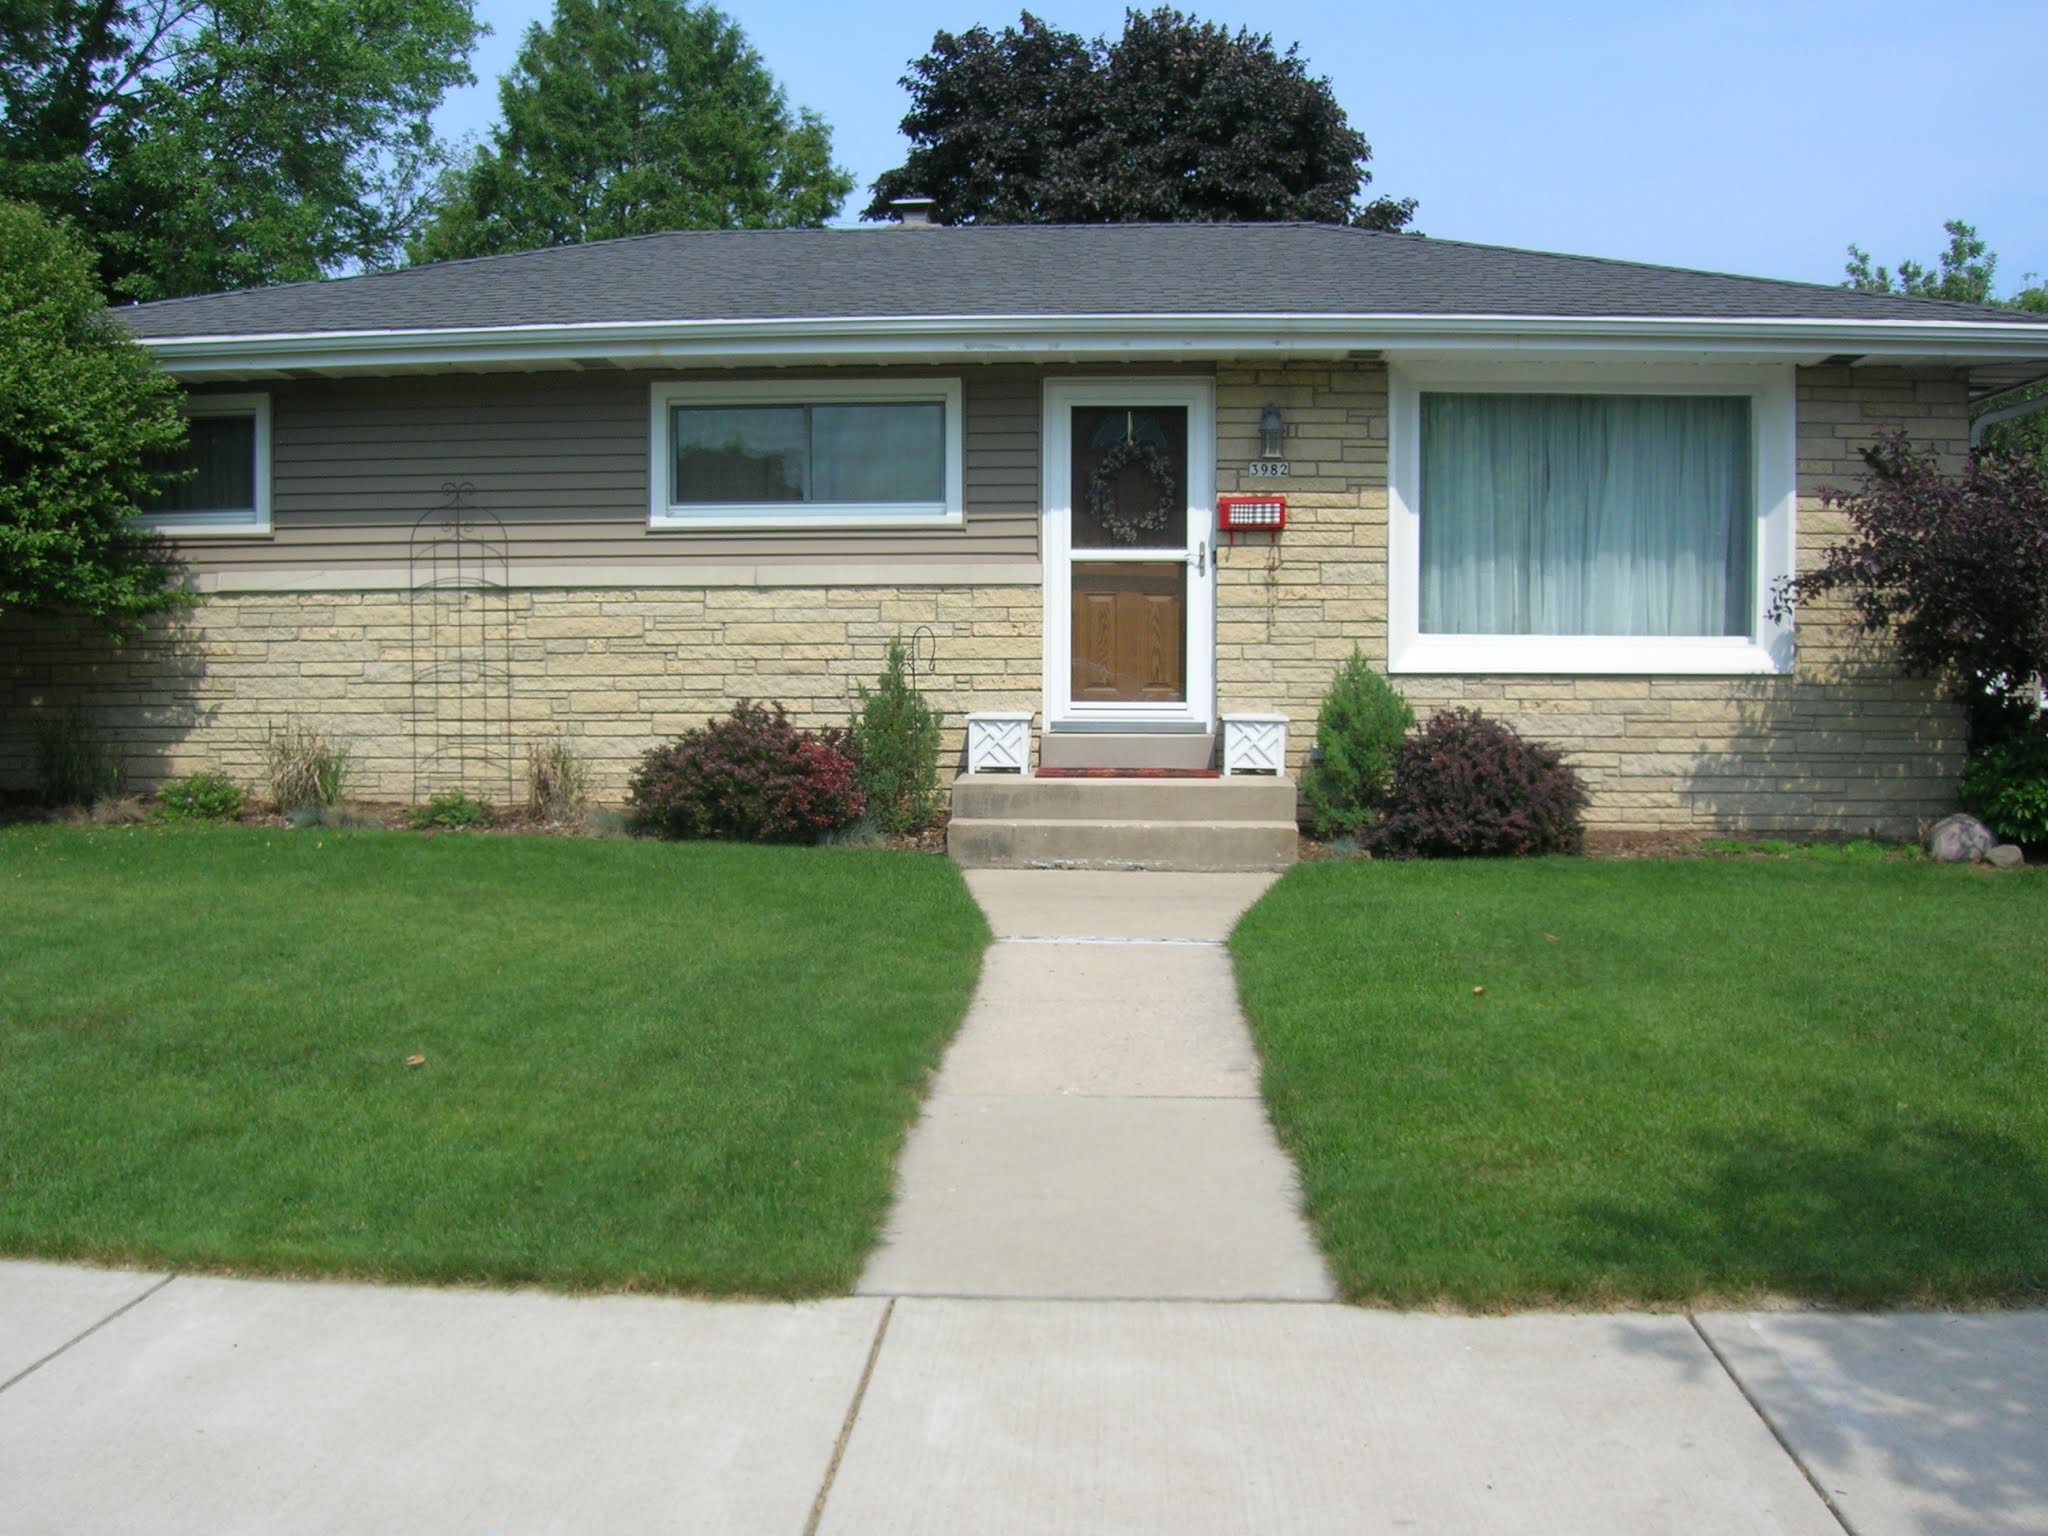
One of the first things I did after I moved in was put up sheer curtains across the front window so people couldn't stare into the house 24/7/365!  I like my privacy.  

Within a few weeks I added a rug/mat to wipe shoes outside the front door and later added matching planters on either side of the door.  Below is a photo taken about 2 years after I moved in.  I had painted the original mail box red, added a swatch of wallpaper across the front of it to add some contrast to the red, and moved an old black metal trellis (that had been in the flower bed along the north side of my driveway) to between the windows on the left front side of the house.  I also hung a decorative wreath on the front door and change it out with the seasons.  What looks like a dark streak underneath the mailbox on the right side is a string of colored beads on a metal chain with a little bird on top.   The old mail box had two "hooks" hanging from underneath where a rolled newspaper could be inserted, and those hooks were great for holding decorations, especially at Christmas.


I don't recall the exact timing of improvements as I made them, but I had always wanted a red front door and finally, after living in the house five years, I got around to painting the fiberglass front door a bright cherry red, in the summer of 2019.  Yeah, it takes me awhile to get motivated sometimes.  Below is a photo I took during the painting process.


In 2019 I also added the following (via the wonderful work of a handyman):  (1) new light fixture; (2) new address plaque that is more visible and readable from the street (I covered up the old built-in address plaque with a piece of painted styrofoam, you can see it underneath the light.  It always bothered me that the house number wasn't centered under the light); (3) new larger red mailbox; and (4) the decorative shutters on the picture window.  

I had added the two artificial topiaries on either side of the door in 2017 (I think) and they lasted about three years before they started falling apart from sun damage.  Every time I touched one some of the artificial leaves would fall off.  I stored them inside in the basement during the winter, it was the sun that got to them even though they were treated to resist UV damage.  That front door and everything on the little front porch takes a real beating in the summer with sun from the southwest and full west.  I retired them at the end of the season in 2020.  In the photo below, taken in autumn 2019, you can see I added a second set of planters (temporary only) that were filled with hardy garden mums going into the fall.


With 2020 came the COVID-19 pandemic.  Despite the extreme heat and humidity, I got more active around the yard and the house than ever before.  Summer 2020 was when I finally lined the front garden beds and a garden bed in the backyard with small concrete retaining wall blocks I had bought from a niece-in-law a couple of years before.  They'd been sitting out behind the garage ever since then - a huge stack of them.  

Each block weighed 14 pounds and I lugged each one about 100 feet from behind the back of the garage in the backyard to the front yard, one by one. 


The white plastic trellis replaced the black metal one to anchor the space between the two windows on the left side of the house in 2016 or 2017.  It shows up much more against the colors of the house, but is stored in the garage during Wisconsin winters.  The photo above is what the house looked like in summer 2020.  You may notice the little bird house hanging from a shepherd's hook to the left of the front steps. In the autumn and winter that goes into storage and is replaced by a lantern with a battery operated timer candle.  

And below are some photos of what the front of the house looks like now, autumn 2021.  


The planters were filled with red geraniums and white petunias from May to the end of September, but as the weather got cooler the petunias started to look a bit straggly, so they have been replaced with some splashy-colored (orange, yellow, red) hardy daisy mums, and the planters have been supplemented with some artificial autumnal picks.  The hardy dais mums cost 10 and there were four individual plants in the one pot I bought at my local supermarket.  I call that a bargain!  My Halloween/Thanksgiving ceramic pumpkins and owls are outside in front of the planters, and the candle-lit lantern is on the right at the bottom of the steps:


On the left side of the front, this year (2021) I added two red drift hardy roses in late May along with some white dianthus.  On November 1, 2021, they're still blooming away!  The original tall grasses that were in the spots where the rose bushes now are just didn't do very well for me, they faded away more each year.  I finally took out what was left of them in 2019 and the garden bed was left pretty much bare other than for existing shrubs and a very large volunteer columbine that appeared a few years ago (that I removed this year and transplanted elsewhere).  The drift roses will survive the winter, but I am crossing my fingers about the white dianthus making it through to spring 2022.

On the right side of the house, I added some seasonal color with two of the hardy daisy mums.  My poor hostas took a real beating this year.  We had record-breaking heat, extremely high humidity, and a drought - all at the same time.  The two hostas that get the most sun were damaged with sun scorch, insect damage and perhaps some kind of infestation.  But from the sidewalk, the damage isn't as noticeable and the bright daisy mums add a spark to this smaller garden bed underneath the large picture window.  We haven't had a hard freeze yet, so I'm letting the leaves that are still on the hostas continue to take in the sun while they fortify their roots for the coming winter.  

For the cost of the changes over the years, I don't have an exact figure in my head but I'd say maybe between $700 and $800 over seven years, not including the cost of live plant.  The largest cost was for the burst of activity in 2019 when I ordered custom-made shutters for the front picture window, the new porch light, the new address plaque and hired a handyman to install them for me since I have no skills (or the correct tools and know-how) when it comes to doing work like that.  All in all - I consider the cost over the years a real bargain, and I love how my house looks on the outside.

But there are always more projects to do.  Am thinking of doing something with the front sidewalk, which has sunk quite a bit in front of the front porch.  Also am not a fan of the concrete front porch.  The flowering cherry on the left side of the house is too large to be that close to the house, even after having it trimmed back substantially in March.  I would like to replace it with a tree that won't overtake the house.  The garage needs rain decent rain gutters.  I would like to cut down on the lawn area in both the front and back yards but do I really want to add more garden beds to what I already have???

Decisions, decisions...

Thursday, June 6, 2019

Revamped Wreath for Front Door

Hola!

I still haven't gotten around to painting the front door that bright red.  I've got the paint, I've got the supplies, I just don't have the "get up and go" to do it.  But I'm working on that...

Meanwhile, the old wreath that I got from my mom when it was already old and starting to fall apart has been used on my front door during the spring and summer since 2016 or so.  The artificial flowers used on it are so old that they are made out of something that resembles styrofoam, not silk.  Every time I touch one of the accidentally, little bits fall off.  And like styrofoam, they stick to you like glue and refuse to behave to be cleaned up easily. 

I wanted a new wreath.  Have you priced beautifully decorated wreaths?  Holy Hathor!  And so I got the brilliant idea of redoing the wreath myself.  The grape vine wreath itself seemed to be in rather good shape, despite its age.  Ahem.  The original plan was to create a dream of a wreath decorated with black and white ribbons and red flowers, like this one:

Image result for black white and red spring wreath

In my wildest dreams.  Surely, I thought to myself, I can recreate something that at least vaguely resembles that gorgeous wreath using the same colors and similar ribbon!  But that plan came to nought when neither the Family Dollar nor the Walgreens nearest me had either nice black ribbon, or nice white ribbon, or black and white polka dots, plaid or striped ribbon, or really - practically any kind of ribbon at all!  Nope.  It appears these days, everyone is expected to use gift bags that don't require ribbons.  Hmmm....

I also couldn't find anything remotely resembling the beautiful red mums or whatever they are, or the gorgeous greenery.  Or even the little red daisy-like flowers with the yellow centers.  Or the little white flowers - other than the really old and falling apart little white flowers made out of styrofoam already on the wreath I wanted to totally strip down!

So - Plan B.  Okay.  I had no Plan B. 

Then I thought, well - I could try spray painting the wreath, or some fake flowers - or something.  Maybe fake birds?  Um - I nixed that plan too (thank goodness).  The thought of hanging up a spray painted bare naked grape vine wreath on my front door did not appeal. 

So, I dug around and dug around in my linen closet, my junk cabinet, the corners of all the closets and underneath the beds and in the drawers, and all the stuff stashed in the basement that I'd never bothered to unpack and voila!  I found several rolls of white tulle/fine netting - probably meant for bridal use.  I remember buying them at the Dollar Store at the Greenfield Shopping Center some years ago when the Dollar Store still was stocked mostly with things that only cost $1.  I also found some slightly used white satin ribbon that I must have taken off of a gift years ago and stashed away, knowing just like my Grandma Newton did during the height of the Great Depression, that someday I might need it!  And I found some black wide ribbon-like substance that resembles grosgrain ribbon, but isn't, and some skinny slightly used curling white ribbon along with a partial roll of what was left of the unused curling ribbon.  I thought - I've got enough to work with here.  I also dug out some white silk daisies that I ended up not using. 

Working on the kitchen counter, I started removing the styrofoam flowers.  Being a frugal kind of gal, I didn't throw them out like I should have.  Nope, I tossed them into a plastic bag for "future use."  I'll have to think about that.  Here, you can see bare areas where I already picked off or pulled off or cut off the flowers.  You can also sort of see the mess they made - little "dots" of white styrofoam and bits of stem all over the place.  I was going to go with an entirely bare wreath, but I decided that caution was warranted and I left about 1/5th of the flowers on the wreath.


When I'd finished removing flowers and was satisfied with the styrofoam "beauties" left, I started wrapping the tulle/netting around the wreath:


I used the entire roll and had enough left over to make a "ribbon."  Oh brother!  


Rather than frighten you half to death, I decided discretion was the better part of wisdom (or whatever)  and didn't take pics of my feeble attempts at bow-making.  The ones I ended up with are bad enough.

To make matters worse, I made a "bow" out of the slightly used white satin ribbon.  Then because it looked so awful I attempted to cover it up with what was left on the roll of tulle.  Okay, take a deep breath:


I thought - WAAAAAAAY too much like Maid Marion's wedding wreath plunked on her head at the end of the darker "Robin Hood" movie that came out against the blockbuster "Robin Hood: Prince of Thieves" movie starring - get ready for it - Kevin Kostner who played the role with no English accent.  I liked the darker Robin Hood movie much more, and Maid Marion was played by Uma Thurman in that film, with a bad ass attitude!

So, I wonked up the dangling tails and went with Option #2:


So there you have it, TA DA!  Too bad I don't have a close-up of the wreath "before."  Oh well.  Believe it or not, this is an improvement.  Oh - yeah - that's a bright red wreath hanger, that people usually use for Christmas.  Since I don't have my red door yet...

Monday, May 27, 2019

Making Progress on Curb Appeal for the Front of the House

Whew!  It's only been nearly a year since I more or less settled on a slowly evolving plan to add some curb appeal to the front yard and front facade and "stoop" area, a plan that's been evolving over the past four-plus years!

Last year I made a big push and I ordered (and received) a bunch of items:  (1) new porch light (2) tall shutters to frame the picture window (3) new address plaque (4) new mail box.  As a reminder, this was what I started out with when I purchased the home in 2014 (listing photo, below):


One of the first things I did after I moved in (July 2014) was paint the old black mailbox fire-engine red, with possible plans to later paint the front door red as well (still to be done).  In 2015 I added planters to flank the front door and filled them with annuals:


And that was the way it stayed, more or less, except that the grasses started dying out and the small viburnums weren't doing well.  The flowering tree on the left (I don't know what kind it is, it gets covered in pink blossoms in the spring) and what I think is a purple leaf sand cherry on the right anchor the ends of the house, and are thriving.

In 2017 I decided to stop spending money annually to buy plants for the front porch planters and I bought two artificial topiaries through ebates online from the Home Shopping Network to flank the front door.   I also added a 57" tall white vinyl trellis from Home Depot to fill in the blank area between the two ranch style windows on the left. I finished things off with a new coir "Welcome" mat for the front door that I saw in HGTV magazine.  I found it at Steinmart for a great price.

I won't bore you with all the details about disappointments in trying to find a reliable handyman in 2018, making appointments only to have them cancelled, etc.  Suffice to say, it was not a fun time.  I have neither the tools nor the skills to do the sort of installs that were needed, and I was stuck!  Feeling so stuck, and wondering if I'd just wasted money buying items that were never going to be added to my house, I  didn't get around to painting my front door red like I wanted to, even though I bought the paint!  I had originally planned for everything to be finished by July 4 - 2018!  It didn't happen.

So here it is, nearly a year later.  And, finally, some progress!  On May 24, 2019 my new handyman arrived and did the installs of the items I bought last year, hooray!  I also added new plants under the picture window to replace the items that had died out over the last few years, leaving a large blank spot across the front of my house.  I added a second set of white planters I already had to the stairs and filled them with white "Pot Mums" that look like daisies.  More to do, but here are a few pics:


Of course bad photographer that I am, I didn't realize I was taking a picture of myself in the storm door, LOL!  Ignore the woman in the glass! 

You'll notice I have two address plaques.  The one underneath the light is actually inset into the brick facade on the house, there isn't anyway to (easily) remove it.  I thought that the new light fixture would mostly cover it and that's why I custom-ordered a new plaque and installed it to the left of the door. 

Still more to be done, but it's coming along - finally.  The next step will be getting that front door painted, and adding a cement stone border to line the garden beds.  I have the paint, I have the cement stone blocks - I just have to do it if it ever stops raining!  Five out of seven days, rain rain rain.  Including today, Memorial Day.  Ugh!

Wednesday, July 4, 2018

Fourth of July (Hooray for the USA, Happy Birthday!), Heat Wave Continues, Trellis for Front Yard

Hola!  First and foremost, I wish everyone a Happy 4th of July.  Depending upon whether you date Lady Liberty's age from 1776 (Declaration of Independence), in which case today we are celebrating the 242nd year of our country's birth, or from 1781 (Articles of Confederation forming the United States signed by the original 13 states) if she's fudging on her age a bit, and is a frisky 237 years young today!  Whoop whoop!

It's hot as Hades here again today.  No relief for the wicked?  Maybe we're all being punished these days, certainly feels like it in this neck of the woods.  Unrelenting heat wave after heat wave, each worse than the last.  The air is so thick and still this morning you can literally see it slicing if you swipe a butter knife through it!  'truth!  So thick, it's hard to breathe, even standing still.  I delayed cutting the front lawn until 7 p.m. last night, hoping to catch some marginally cooler air as the Sun started its descent in the western sky.  Didn't work.  After 45 minutes of cutting I was sweating like a stuck pig and covered in yechy!  It took me 15 minutes to scrub myself down in the shower, it was so thick.  It seems no matter how much liquid I drink, the sweat gets thicker and ickier the hotter it gets.  There was no breeze to speak of last evening, nothing to even pretend you're cooling off! 

This morning I was out by 6:30 a.m. to sweep up the grass clippings from last night and contemplate whether I should trim or not.  I really should trim, but it's not going to happen in this weather.  The Sun is full up now above the house and the front will be drenched in sunlight until around 7:30 p.m. this evening.  I didn't want to pull out my grass trimmer this morning at 6:30, taking my neighbors into consideration!  I limited myself to sweeping, a silent activity.  I worked for about 40 minutes and gave up.  I had to come in and take another shower.  Geez, and I can't even use the waste water to wet down the garden beds, that's the worst of it, sigh. 

Now it's 10:30 a.m. and I'm hearing some brave soul out there (on the 4th of July???) cutting their lawn.  IN THIS HEAT AND HUMIDITY.  That person is mad, I tell you, mad.  Or under 20 years of age. 

I may have mentioned somewhere in my last few posts that I was thinking about buying something, possibly a trellis, to add some "pop" to the large blank space.  I spent some pleasurable time window shopping online, and I actually bought one!  It came in pieces, and I assembled it recently in my living room:

All the parts, spread out in my living room.

Assembly in progress.

All assembled and ready for outside!  You can catch glimpses of my egg collection
and my collection of pink elephants inside the china hutch - tons of storage below, too.

It's 75" tall and 28" wide, so it will give me some much-needed vertical interest on that side of the house, and the white will show up well against the siding above the lower stone veneer on the house.  It was purchased from Home Depot, the Wellington PVC trellis.  The total cost was $57.27 including tax.  Shipping was free. 

Keeping a running total, the cost of my outside curb appear updates is now $359.67.

The trellis is now outside in place, but I'm not going to show any photographs of it until the great and final "reveal" of this summer's curb appeal project.  Because of a hiccup that I'll write about in my next post, I won't be able to wrap things up until the 3rd week of July as it now stands. Darn it all, $%&^@%^*!.  Yes yes, I know - patience is a virtue...

Sunday, June 17, 2018

Cost List for Adding Curb Appeal Projects

Hola!  The heat index hit 102 degrees F today here in my hometown.  The "lows" this evening will drop down to the high 70's, so the AC will stay on this evening and the windows will remain closed, sigh.  Relief is promised for Tuesday when a cold front from the north is supposed to start pushing through dropping the temperatures into the more normal for this time of year 70's with much lower dew points.  Again today the dew point is over 70 and it feels like a combination of an incinerator oven and too much steam in the steam bath outside for me to be comfortable.

I was out again, however, between 7:00 a.m. and 7:45 a.m. cleaning out and adding fresh water to the concrete bird bath (acts as the equivalent of Grand Central Station in NYC), watering a few shrubs and plants that did not get the benefits of the thunderstorm we had Friday night/Saturday early morning, and sweeping up nut shells from my tribe of squirrels - the mess never ends even if the weather keeps them away in their nests for most of the day.  A few of my squirrel tribe who have nests around my house do come down to the yard and lay in the shade in the grass, with their hind legs stretched out behind them, just like dogs do.  So cute!

I thought you might like to know what it's costs me thus far to embark on this round of adding curb appeal projects to my front yard.  As I've mentioned before, I'm retired and on a fixed budget, so I keep a close eye on those "miscellaneous expenditures!  So far, this is what I've spent to add some pizzazz to my front yard.  Cost includes shipping plus sales tax, if charged:

New red mailbox:  $47.99
New black porch light:  $60.58
Apple Red Rustoleum Paint for front door:  $8.65 (32 oz., which will be more than enough to provide me with two coats of paint for the door)
Black shutters for picture window (15" x 70"):  $68.89
Two artificial 3-ball topiaries:  $49.93

Total:  $236.04

This does not include the cost of installation of the new porch light, or the mailbox and shutters, which requires a masonry bit on a power screw driver/drill and a good ladder tall enough to reach the top of the picture window framing.  I am going to ask a neighbor who owes me a favor if he has the tools and know-how to do this and if he would be willing to help me out.  If not, I will have to hire a handyman to do these 3 installs for me.

Stay tuned.  I am dreaming of lush front yard garden beds extended out from the house to cut down on the amount of lawn I need to care for/cut, and have been day-dreaming over endless Pinterest photos of gorgeous front yards that would be ridiculously labor intensive to keep looking that good.  My reality is that my well-tended stretch of lush green grass actually needs to be cut RIGHT NOW both out front and in the back yard, but I'm not going to attempt it with the heat index over 100 degrees F and dew points in the tropical zone, I'd keel over in 10 minutes tops!  If I'm going to have to cut the grass every 5 days during this time of year, I want to minimize the area that needs cutting for sure!  That means expanding the flower beds.  That is something I think I may be able to afford to hire a landscaper to do for me (remove sod and add edging, I'll do the planting and primping).

However, tomorrow I am going to be calling around to firms that specialize in poly-foam injections to raise concrete slabs and sidewalks, etc. to arrange for free estimates.  I want to find out exactly how much it would cost me to have my front sidewalk raised where it needs to be so I don't have a giant size step to the first step on my front porch. From what I've read, it supposed to be more stable over time than the traditional mudjacking technique using concrete and soil injection to raise a slab, etc.  I've been sitting on that project since I moved into this home nearly 4 years ago, and it's time to get it fixed.  No more procrastinating, Jan!

Updated June 18, 2018:  Oops - I made a mistake.  The two topiaries' cost (including shipping) is $116.29, not $49.93 as I previously reported above.  Thus, the total expenditures for my planned front yard pick-me-ups is $302.40, not $236.04 as previously stated.  Me bad, mea culpa!

Friday, June 15, 2018

A To Do List to Add Curb Appeal to the Front Yard

If I had tons of money I have visions of adding a peaked roof portico to shelter guests from the rain on the front porch and expanding my pedestrian front concrete stoop into a magnificent mid-century modern deck with multiple steps down and built-in planters, with a flagstone walkway to the public sidewalk.

I would expand the garden beds, remove the tree that was planted too close to the bedroom corner of the house and have an appropriately sized tree (when mature) installed further away, and add tons of beautiful plantings.  Or I might decide to go full-blown English cottage garden, complete with white picket fence and rose bushes everywhere, and a pillared front porch with a porch swing.  I'd hire a professional landscape architect to do a fabulous design for me who would hire contractors to do all the work.  I'd never have to lift a finger except to sniff and point if something doesn't please me. Or I'd buy a Cajun (French) style cottage and fix it up to look exactly like this one:

not-plain-brick-home
Source:  Laurel Home blog. This is an "after" photo 
To fully appreciate the scope of the work that was done, here is the "Before" photo from the same source:

plain-brick-home-before

Ahhhh, I wish I had some of those trees.  I'd also have a full-time gardener to take care of it all, LOL!  To sleep perchance to dream...

Back to reality, THUD.  On a limited retirement budget, dreaming of various gorgeous front (and back) yards is fun but can also be a bit depressing.  That can paralyze you from doing anything because a few small changes here and there don't see like they'll make that much difference.  And even those few extra things will stretch the budget and make you think twice about splurges that you really should not do because what if my Medicare increases by 50% or even disappears in 2020 if Speaker of the House Paul Ryan gets his way?  I wouldn't be able to do a time reversal and unspend the money.  One must be practical.

It's hard to believe, but next month will be four years from my 2014 move in date on July 7.  Wow, time really is flying.  I'm going to be 67 in a few months.  I still have painting to do on the inside (yes, I know, me bad.  Me very very bad.)  And it makes me mad that I have to worry about spending maybe $500 in total to do some things to prettify my front yard which already looks respectable as it is.  I want to be able to enjoy my house and be satisfied with how it looks on the outside and the inside in my old age.  Is that too much to ask after working my butt off for 46 years, playing by all the rules, and saving saving saving? 

One of the first things I did after moving in here was painting the black and worse for wear mail box a bright shiny red.  I had mentioned that to a friend in passing, and as part of my birthday present in 2014 was a can of bright red gloss spray paint!  Free!  The mailbox's fate was sealed.  I love how it turned out.  I always intended to paint the front door red too, and this year, finally, in fact today - I pulled the trigger and ordered the paint to get it done!  I really want my red door, it's been silly to wait so long, so I will not wait another 4 years before I get around to actually opening the paint can and rolling on two coats of paint.

About six weeks ago, I repainted the current (old) mail box in gloss red again because rust spots were coming through, despite using Rustoleum.  That mailbox has definitely seen better days.  It may be nearly as old as the house (the house was built in 1956).  I also wanted an actual factory-finished red mailbox, not buy a less expensive black one I'd have to spray paint every few years.  So, last month, I shopped around and found one I liked online at Wayfair.  It's much larger and an entirely different style from the current traditional mailbox and I think the new mailbox is a bit more "modern" looking.  It arrived last week and it's gorgeous, but the mounting holes on the back don't fit the screws that are holding the current mailbox in place on the stone front of the house.  I don't have a drill with an attachment to drill into masonry, let alone a power screw driver, so I will hire a handyman to do that - along with a few other things that I'll note below.  Here's a pic of the new mailbox, by Nach, from Wayfair:
I also decided to add a pair of budget-friendly vinyl shutters to the ginormous picture window with oversized white vinyl trim.  I've thought about adding shutters to that window since Day 1 and, again, finally decided to pull the trigger.  It took awhile to decide upon a style as I was shopping online.  I quickly decided upon the paneled style as more suitable to the house, but then I came across some shutters that had three raised panels instead of two, and I loved the look.  But then I looked at my front door, which has four less ornate raised panels, and decided to go for a simpler two panel raised design.  This took a few days of looking looking and looking again and then stewing about it for a few nights to make up my mind.  I finally settled upon black raised panel shutters (two panels of equal size) in a premium heavy vinyl guaranteed for 50 years (if I live that long I should win a prize).  These are from Architectural Depot, which offers a huge selection of all kinds of styles and colors and free shipping:


I also ordered a new porch light, something I'd also been putting off, something a bit more modern looking (to my eyes, anyway) and a bit less traditional than the current coach lamp light, which I am not too fond of.  I found this one at Target and liked it a lot, so I pulled the trigger right away to get a 15% Father's Day discount.  It's 14.5"tall by Bel Air Lighting, and will make a statement above the cleaner lined mailbox with its equally clean lines and crackle glass:

I may also end up installing a kick plate to dress up the front door once it's painted, but it's not something I need to add right now.

This year things didn't work out with two different friends who said they would take me shopping for flowers but didn't.  I don't drive, and the garden centers are too far away to either bus to in a reasonable amount of time or are not on bus routes at all.  Plus, try lugging home two flats of flowers on the bus - I wouldn't attempt it!  Thus, my front porch planters are EMPTY!  It's really been bugging me.  Here it is, nearly July, and my planters are vacant and forlorn looking, up their on the front porch with no beautiful plants in them for people to admire as they pass by the house.  After thinking about what I could do to find some way to fill those planters, because I hate having them empty when people so enjoy the display every year, and then thinking about how much I've spend each year just on annuals alone, I decided on another splurge and ordered a pair of artificial 3-ball topiaries!  I've always wanted to buy them but never wanted to spend the money.  However, being carless (and even if I had access to a vehicle, I don't know how to drive, LOL!), beggars can't be choosers, so I found a good deal at QVC online for 3-foot tall topiaries that I fell in love with, and got a 5% discount plus a slight additional monetary discount by purchasing through Ebates.  Every dollar saved helps.  Here they are, so elegant!

   34" Boxwood Triple Ball Topiary Potted Plant by Valerie

They will be anchored firmly inside my white Chippendale style planter boxes so the black pots, which I know will tip over in the first breeze to come along if not inside the planter boxes, will be stable and hidden.

The handyman I hire will install the mailbox, the new light fixture, and the shutters. I'll paint the door. I'm also planning out some changes to the front yard garden beds that won't cost me anything but time and a lot of sweat, huffing and puffing in the heat and humidity and bug bites (they bite me even through Deep Woods Off, heavy jeans, sweatshirts and knee socks on).  It involves transplanting some current perennials I already have elsewhere that need to be thinned out and/or divided - beauty at no cost and they'll fill in bare spots I'd been planting every year with annuals, not good for the pocketbook buying new every year.  Trimming shrubs is also on the menu.

Project List:

1.  Paint front door
2.  Have new mailbox installed
3.  Have new light fixture installed
4.  Have new shutters installed
5.  Install pair of topiaries on front porch
6.  Trim miniature barberry bushes in front planting beds (they're not looking so miniature right now)
7.  Divide and transplant some giant Iris to front planting beds
8.  Remove and transplant giant volunteer columbine that appeared last year by magic and reseeded itself this year, right over a miniature Spirea
9.  Divide and transplant some hostas from backyard to front garden beds (probably a fall project)

I'm going to be busy!

Friday, March 27, 2015

Pondering Front Porch Improvements

Hola everyone!

It's that time of year -- spring is here, well, at least astronomical spring is here in this neck of the woods -- today's high is only going to be 29 degrees F.  Two weeks ago it was 71!  Ah yes, the joys of spring in southeastern Wisconsin.  Blech!

While I continue to be housebound because I HATE the cold and refuse to work outside in such weather to continue "spring" clean-up, I have been contemplating various home improvement projects around this old single story rancher.

I have two pine trees along the south lot line that need to be removed.  CHA-CHING!  I have masonry (concrete) capstones that top the brickwork across the front of the house, one of which is cracked and two of which are definitely sloping the wrong way (water is running toward the siding, not away from it), that need to be repaired.  Caulking is not cutting it.  CHA-CHING!

So what am I doing?  Buying more flower pots.  LOL!


Above is the listing photo of this house that I bought last May and moved into in July, 2014.  Okay looking, but blah.

One of the first things I did after I moved in was paint the mailbox bright red to add some zip to the front facade. Then I hunted around for some planter boxes online and scored a good deal at amazon.com on some vinyl Chippendale-style planter boxes and two large planter-pots that fix perfectly inside.  I filled them with African daisies and asparagus ferns and placed them on either side of the front door:


Better.  It's a little hard to see but I also hung a glass and metal butterfly decoration from one of the prongs on the mailbox, too.  But the front facade is still missing - curb appeal.

Thus, about 10 days ago the purchase of two more Chippendale-style vinyl planters and pots to put inside; those will go at the bottom of the front steps this season, to try and dress things up a bit while I contemplate (and save up for) other improvements to make:


The Chippendale planters are made in Italy and they snap together (like a puzzle) -- no screws or glue needed.  They are vinyl and are easy to keep clean and bright.  The planter pots (two stacked inside each other on the left), are also vinyl.  They have two plugs in the bottom that can be removed for water drainage, and are made in the USA:


I have been thinking about adding:
  • white vinyl railings to the front stoop
  • narrow shutters on either side of the picture window
  • new porch light - size and color yet to be determined
  • planter boxes underneath the short windows - black? or white?
I wasn't sure if a railing would work on the stoop -- it is not a large space (about 3' x 6'), but I found some photos on line that look similar to my porch size, and I think it would work on my house:

Photo source.

If I get a railing installed this season, I would probably just flank the sidewalk in front of the bottom step with a pair of planters and remove the other pair to my back patio, I'd have to see how it looked but I'm thinking having planters on the porch with the railings in place would make it too crowded feeling.

Photo source.
The house above is down the block from mine and is its mirror image floorplan wise.  I almost bought this house, but they had done a lot of remodeling inside and were asking $10,000 more than other houses were going for in the neighborhood.  I put an offer on it but we couldn't agree on price.  Ain't she pretty?  Massive curb appeal!  The picture window is the same size as mine so I know there would be room for narrow shutters on either side of mine:

Tuxedo grey raised panel shutter,
Home Depot.
Black raised panel shutter,
Home Depot.
 I like the look of these raised panel shutters I found online at Home Depot.  I don't have room for shutters on my two short windows though, they are spaced wider apart than the windows on the house above and my end window is mere inches away from the corner of the house, leaving no room for a shutter.


.

That is why I'm thinking planter boxes to add some oomph to the short windows.  White?  Black?  Would white planter boxes look out of whack if I frame the picture window with black or charcoal grey shutters? I don't want to do everything in white.  It doesn't look like it in the photos of my house (top 2 photos above) but those short windows are each 75" long!  Vinyl window planter boxes would be pricey (about $184 each for closet non-custom size of 72"), but they would be really pretty:
Photo source.
 How about a red door to go with my red mailbox?

Photo source.
I love the color combination above -- the colors on my house would be nearly identical.  And I'm absolutely wild about that red door!

Photo source.
Above is another house with a color scheme of red, black, white and a taupe-y like siding color.  If I can get my house to look as cute as the two red-door houses above, I will be one happy camper!

Also on the agenda is expanding and curving the flower beds to cut down on lawn area, and doing some transplanting.  I'm going to have to get my digging mojo on!

Last year I thought a lot about adding  a pergola to "enclose" the front stoop, but for the price of a vinyl pergola I could get my shutters, window boxes and vinyl railings and still have money left over to buy some plants for expanded planting beds.

Oh - and here's a picture I just took of the front porch light:


From the top of the wall mount to the bottom of the light is not quite 13".  It can't go much longer than that because of the built-in address plaque below.

I don't find it obnoxious.  Maybe just paint it?  (How?)  The metal finish has faded to a dark grey and there is some corrosion, but no obvious rust.  The fixture matches the one at the side (kitchen) door on the driveway.

Lots to think about...