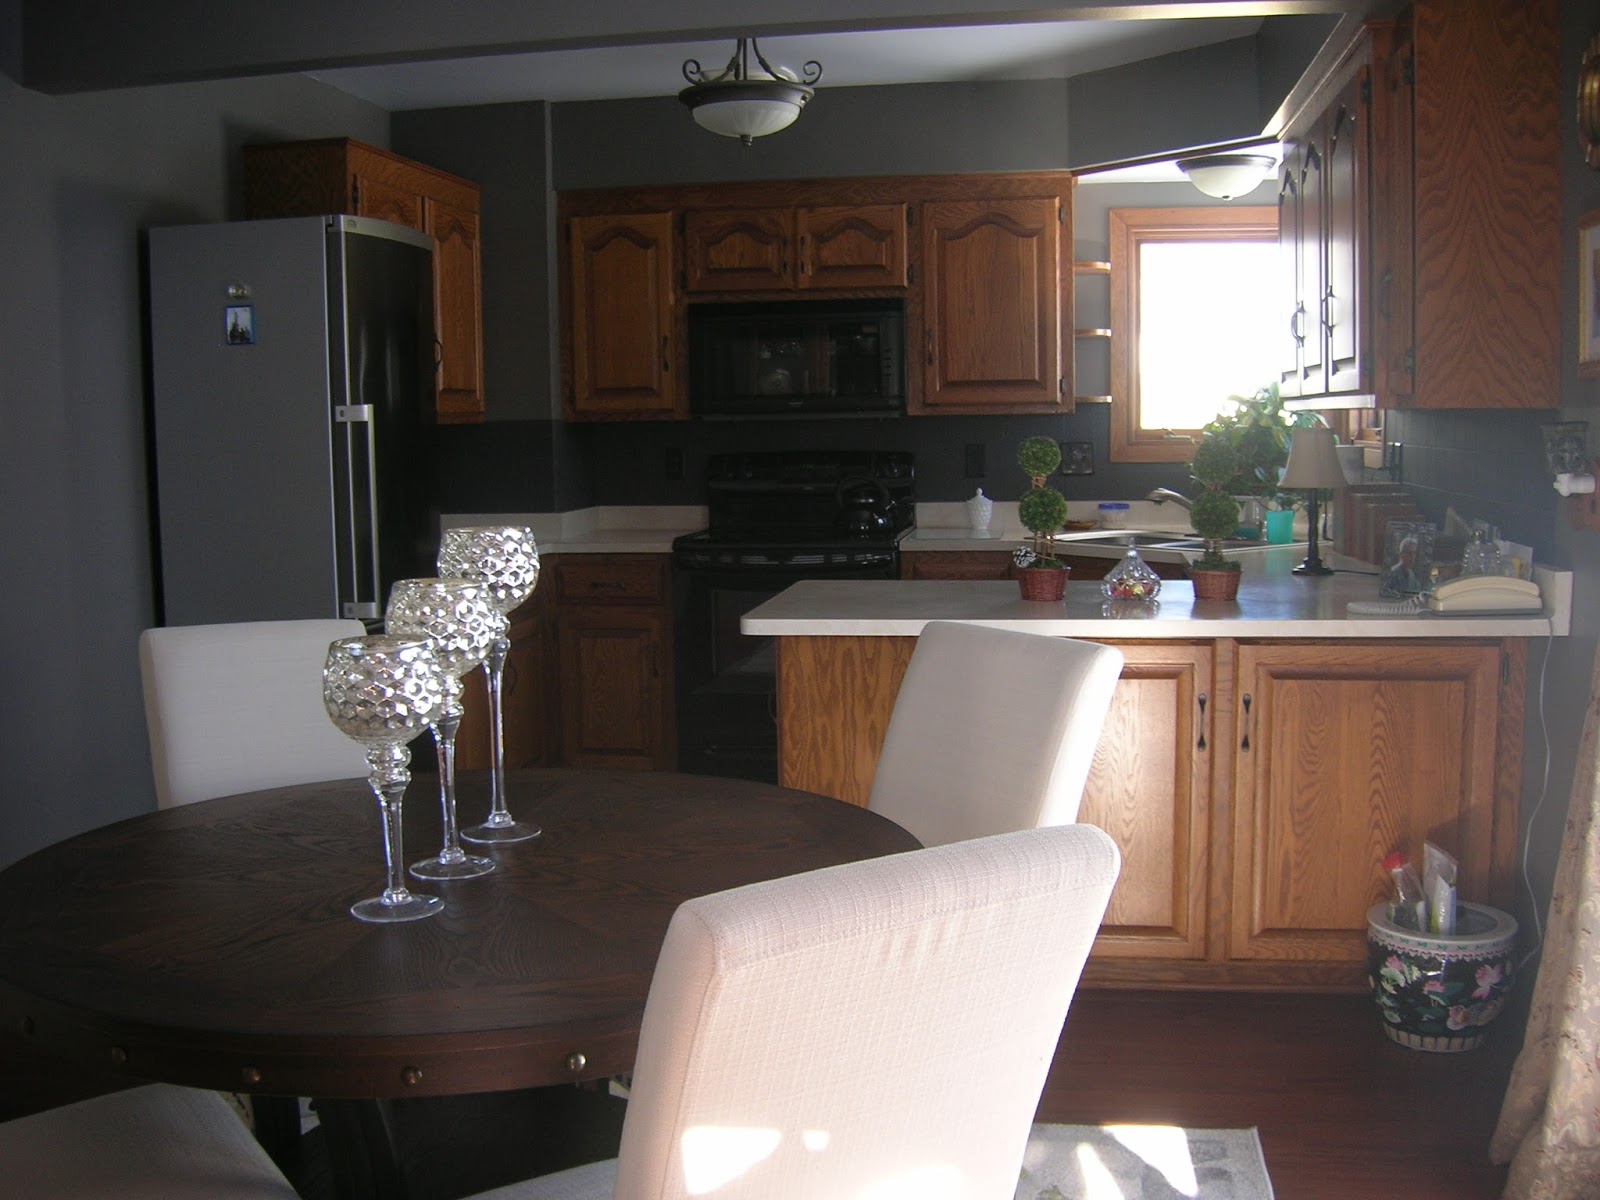
Hola everyone! I hope you all had a wonderful holiday, whichever one you celebrate. This year Christmas, Hannukah and Kwaanzi all seemed to converge around the same time. There are always the Winter Solstice celebrations, too, which are probably the most ancient of all. I always look forward to the day on the calendar when I can mark off that daylight STARTS EARLIER AND LASTS LONGER once again!
That big blank wall staring me in the face every time I walk into my kitchen/dinette area (constantly, it seems) and have tried to avoid looking at --
it didn't exist in quite this form (and was covered up by the fridge) before I had the wall work done, but now POW, there it IS.
I'm not one to decorate every bare wall in my house, but this walls cried out to me for - something.
I dug through my stash of old picture frames and "art" in the basement - several times - and thought I had a plan. But I ditched it. The 24 x 36 framed print of a 17th century Dutch still life of flowers against a black background just didn't seem "right" for the space, somehow. The scale was off, the mood was off, veering too much toward the traditional.
After more pondering and looking around online for abstract art posters (when did posters get so expensive?), I window-shopped online for "marble/mineral" look wrapping paper or wallpaper in tones of gold/grey/white/black. I found beautiful hand-made papers at Mulberry Paper. But I didn't want to order and have to wait, then get frames or figure out what I was going to do for frames or not, etc.
So, I continued to poke around my house and online looking for ideas. WHAT can I use? I ended up using an idea I had used in the living room, just on the other side of that bare kitchen wall. I used mirrors I had on hand, and borrowed three mirrors from the mirror arrangement from the living room. That was taken down in preparation for the wall work done. After I finish painting the patched drywall in the living room, I will make a new arrangement with the remaining living room mirrors.
This is what I ended up with (the borrowed mirrors are the two end mirrors in the top row and the large mirror in the center):
After looking at it for awhile, I lowered the two square mirrors in the bottom row to better even out the spacing so that it matches that in the top row. Turns out the square mirrors are 9" square and the small round mirrors are all about 10" in diameter. The adjustment made all the difference in how the arrangement looks but I haven't taken a new picture of it yet.
The bookcase I ordered (with two doors on the bottom) arrived on December 22nd and has been hanging out against a wall in my rarely used front entrance, waiting for the living room to be put back to its normal arrangement. That will clear floor space for me to unpack the box and wrestle with putting the unit together.
The bookcase will eventually have its back against the side of the fridge, and will "just fit" the width and height of the fridge. It's white, which will be the color of the cabinets when they've been painted. The two bottom shelves will provide covered storage for my squirrels' nuts and birdseed and the upper shelves will provide space for my cookbooks, my wood canister set, and display of some of my favorite glass and china pieces.
It's coming along!
Happy Holidays!
December 17, 2022: Hi all. I'm still here, just been very busy (who of us is not?) I'm working on updating Maison Newton bit by bit, it's been awhile since I changed things up. Happy Holidays to all, soon the Winter Solstice will arrive and then the days will start to get longer once again, hooray!
Showing posts with label kitchen renovation. Show all posts
Wednesday, January 4, 2017
Thursday, December 22, 2016
What About That Back Hall Mess???
Hola everyone! First and most important, this will be my last post before Christmas, so HAPPY HOLIDAYS AND MERRY CHRISTMAS TO EVERYONE.
It's gorgeous here today. After warmer (in the 20s) but dreary and damp weather yesterday, it's a bright and sunny 38 whopping warm degrees today and the snow is melting, hooray! Not a cloud in the sky, this is shorts weather around here, folks. It will be warm through the weekend, with rain expected on Christmas Day. There will still be plenty of snow, though, as temperatures will
Of course leave it up to me be racing ten steps ahead when I haven't even gotten half-way through the kitchen redo. But that back hall! It's driving me nuts.
All of the homes in this area with my house's footprint were built between 1955-1956 and all of them have the angled sink facing two corner windows, rounded "knick-knack" shelves on the ends of the cabinets framing those windows, a peninsula which, in original form, also holds three half round shelves, and a small back hall from the side driveway that tops the steps to the basement and a step up into the dining area of the kitchen/dinette. None of the photos of such homes I've seen, including my own home, has any indication that there was ever a door from the back hall into the dinette.
As a practical matter, a regular swing in or swing out door wouldn't work, there just simply isn't enough room. There isn't enough room for a pocket door either, or a barn door on a runner, unless light switches are relocated. So, that back hallway is open to view from the kitchen/dinette area. And mine isn't very pretty. It holds my trash container, my recycling container, a four-tiered wire shelf unit holding myriad gardening tools and supplies; there are five coat hooks that hold my purse, jackets during the summer and a host of winter regalia this time of year (gloves, hats, scarves, coats/jackets), a broom, a snow shovel this time of year, and a dust pan. And then there is the shelf above! That holds yet more stuff, but it's difficult for me to reach; I usually have to pull out the mini ladder to access some of the items.
So - a picture is worth a thousand words. More pictures are worth more words, right? You can get a glimpse of the stuff in that back hall in this photo:
Okay, two are enough. I think you see the problems. LOL! Not exactly the kind of thing one wants to look at when sitting in what I hope to be a sort of "lux" dining area experience.
So, I started thinking about what to do back there to try and streamline storage and make the space presentable, since I cannot cover it up. Well, I could hang a swagged curtain, but that is so 1970s and would also get in the way. I am constantly in and out of that back hall area and I can quite easily picture myself getting tangled up in any kind of draped curtain.
The shelf has to go. So do all of those coat hooks. I'll be shopping for some kind of cabinet that will hold nearly everything, which will go a long way to improving the "view" from the kitchen/dining area and making me much happier.
I'll let you know when I come up with something. Failure is NOT an option :)
It's gorgeous here today. After warmer (in the 20s) but dreary and damp weather yesterday, it's a bright and sunny 38 whopping warm degrees today and the snow is melting, hooray! Not a cloud in the sky, this is shorts weather around here, folks. It will be warm through the weekend, with rain expected on Christmas Day. There will still be plenty of snow, though, as temperatures will
Of course leave it up to me be racing ten steps ahead when I haven't even gotten half-way through the kitchen redo. But that back hall! It's driving me nuts.
All of the homes in this area with my house's footprint were built between 1955-1956 and all of them have the angled sink facing two corner windows, rounded "knick-knack" shelves on the ends of the cabinets framing those windows, a peninsula which, in original form, also holds three half round shelves, and a small back hall from the side driveway that tops the steps to the basement and a step up into the dining area of the kitchen/dinette. None of the photos of such homes I've seen, including my own home, has any indication that there was ever a door from the back hall into the dinette.
As a practical matter, a regular swing in or swing out door wouldn't work, there just simply isn't enough room. There isn't enough room for a pocket door either, or a barn door on a runner, unless light switches are relocated. So, that back hallway is open to view from the kitchen/dinette area. And mine isn't very pretty. It holds my trash container, my recycling container, a four-tiered wire shelf unit holding myriad gardening tools and supplies; there are five coat hooks that hold my purse, jackets during the summer and a host of winter regalia this time of year (gloves, hats, scarves, coats/jackets), a broom, a snow shovel this time of year, and a dust pan. And then there is the shelf above! That holds yet more stuff, but it's difficult for me to reach; I usually have to pull out the mini ladder to access some of the items.
So - a picture is worth a thousand words. More pictures are worth more words, right? You can get a glimpse of the stuff in that back hall in this photo:
Okay, two are enough. I think you see the problems. LOL! Not exactly the kind of thing one wants to look at when sitting in what I hope to be a sort of "lux" dining area experience.
So, I started thinking about what to do back there to try and streamline storage and make the space presentable, since I cannot cover it up. Well, I could hang a swagged curtain, but that is so 1970s and would also get in the way. I am constantly in and out of that back hall area and I can quite easily picture myself getting tangled up in any kind of draped curtain.
The shelf has to go. So do all of those coat hooks. I'll be shopping for some kind of cabinet that will hold nearly everything, which will go a long way to improving the "view" from the kitchen/dining area and making me much happier.
I'll let you know when I come up with something. Failure is NOT an option :)
Wednesday, December 21, 2016
Kitchen Reno: And On the Umpteenth Day, She Rested...
Hola everyone and happy holidays to all!
I have finished doing the painting necessary to cover up the drywall patched and mudded/primed areas, hooray! It took some doing but I'm more or less satisfied with the results. Short of going out and buying more paint so I can redo the entire wall to get even coverage over old and new, it's about all I can do. I used every trick I could find on the internet plus some savvy advice from the handsome young novice painter/drywaller/mudder who appeared on my doorstep some Fridays ago just as deer hunting season was opening up north (see prior posts for back-story), to get the "new" paint to "match" the texture and sheen or "hand" of the existing paint on the walls, which was evidently done some time in 2014 before I bought the house in July of that year. I assume it was 2014 because that's the date on the leftover paint I was fortunate enough to find in the can left in the basement storage area, as most people do no run out and buy paint and then leave it sit around for 4-5 years unopened while they hem and haw about whether they (me) feel like painting. After watering the paint down with 1/4 cup of water I eeked out enough to do the job and even got some touch-ups done, too. And there is a teeny weeny bit of paint left over.
The fridge is in its new home and fits like a glove next to the countertop. Sometime later today the bookcase I ordered should be delivered, and since I finally finished shoveling myself out from under 16" of snow that fell over 9 days (it ended early Sunday morning) in two heavy snowy weekends and the 35 mph winds that created yet more drifts yesterday have moved east, I was able to get back outdoors without risking frostbite in 3 minutes, I will now have time to unpack it and put it together. Well, if I feel like it. It may well until after Christmas.
I have finished doing the painting necessary to cover up the drywall patched and mudded/primed areas, hooray! It took some doing but I'm more or less satisfied with the results. Short of going out and buying more paint so I can redo the entire wall to get even coverage over old and new, it's about all I can do. I used every trick I could find on the internet plus some savvy advice from the handsome young novice painter/drywaller/mudder who appeared on my doorstep some Fridays ago just as deer hunting season was opening up north (see prior posts for back-story), to get the "new" paint to "match" the texture and sheen or "hand" of the existing paint on the walls, which was evidently done some time in 2014 before I bought the house in July of that year. I assume it was 2014 because that's the date on the leftover paint I was fortunate enough to find in the can left in the basement storage area, as most people do no run out and buy paint and then leave it sit around for 4-5 years unopened while they hem and haw about whether they (me) feel like painting. After watering the paint down with 1/4 cup of water I eeked out enough to do the job and even got some touch-ups done, too. And there is a teeny weeny bit of paint left over.
| Fridge now sits where doorway used to be. |
| The hated corner windows, impossible to reach to clean - or open/close. |
| This is now the entry from living room into the kitchen/dining areas - no more window! The sofa normally sits where the Christmas trees are. |
| Looking through the opening from the living room. You can kinda sorta see all the snow piled up in my backyard/patio through the patio doors. |
The fridge is in its new home and fits like a glove next to the countertop. Sometime later today the bookcase I ordered should be delivered, and since I finally finished shoveling myself out from under 16" of snow that fell over 9 days (it ended early Sunday morning) in two heavy snowy weekends and the 35 mph winds that created yet more drifts yesterday have moved east, I was able to get back outdoors without risking frostbite in 3 minutes, I will now have time to unpack it and put it together. Well, if I feel like it. It may well until after Christmas.
Friday, December 16, 2016
Kitchen Reno: Painting Patched Drywall Is - Ugh!
Hola and Happy Holidays to everyone!
We are in for another weekend snowstorm here so I'm keeping this brief because I've got to do two important errands (1) grocery shop and (2) hit the liquor store. We got about 7-8" last week over Friday/Saturday, and we're in for a rerun. Reruns already, geez.
I have started painting the areas in the kitchen where the drywall was patched! I should have done it sooner, of course - but I have to be in the "mood" and the "mood" to paint doesn't strike very often. It is not one of my favorite things to do.
Tell me, please, who DOES THIS:
More about THAT later.
I had dug out the supplies to paint the week before and found a scant amount of kitchen wall paint left in the basement. YAY! So everything has been sitting front and center on my breakfast bar area for more than a week staring at me every single day, taunting me. Yesterday, a nice sunny and bitterly cold and windy day with windchills dropping to 20 below zero, I figured it was time to start painting as I knew I would not be forcing myself to come up with anything else to avoid painting, not even a trip to the liquor store. Sigh.
So, I get the taping done and since I didn't have to tape off the ceiling, it went surprisingly quickly and no up and down my rickety old ladder. I had no excuses left. I got the paint can opened and saw there was maybe 3/8th of an inch of paint left at the bottom of the can. That wouldn't be enough to do the job. So, I did what any rational woman would do. I added water to thin the paint down. It hasn't been used in 2 years, after all, and could use some thinning. I poured in about 1/4 cup (I used a coffee cup that was nearby and added water to it) and stirred everything up thoroughly, giving both of my arms a good workout. I used a small sponge brush to do edges/edging and a small (4") sponge roller to paint rather than a full-size roller, which I knew would suck up the paint tremendously. I don't want to run out and have to make a trip to the big box store to buy a quart of matching paint. I think I have enough watered down grey paint to get the job done.
Even with 2 coats of primer the patched areas sucked up the paint, especially where the mud was applied thicker to try and smooth out the transition between the closed in doorway and existing walls. Close up, as I was rolling away with my tiny roller, I could see all kinds of flaws, but I wasn't about to stop and try and patch/fix/sand the problem areas myself! I'll save that for the time I repaint the kitchen - if that every happens (probably never). The fridge will cover up most of the flaws anyway and it's not like people go around staring at your walls from 3 or 4 inches away inspecting for flaws.
Because I was using the tiny roller, it probably took 2x as long as it would have using the regular sized roller, but I did get a lot of coverage out of relatively little paint as the sponge roller is more amenable to being squished against the wall to urge just a bit more paint out of the roller. There is more than enough paint still left to do a second and even third touch-up coats later today. Building up a couple of thin layers of paint will also help supply much needed "texture" to the new and sanded areas. The walls in this house have been painted several times over the years, and what I thought was an "orange peel" texture is actually, the painter/drywall mudder guy told me, just built up paint texture from multiple layers! Even after just one thin coat, however, I can see success staring me in the face, YAY! That serves as motivation to get this part of the project done.
Now, about that photo of a kitchen outlet near an area where new drywall was applied. I did not show myself removing the actual outlet faceplate. That's right. The dudes who did all the work on the drywall, mudding/sanding/priming -- never removed the faceplate! They mudded right around it! They primed right around it! Of course that got smush all over the thing, and like most men who are blind when it comes to such things, they made a half-hearted attempt at some point to wipe the smush off! Didn't work.
So, after I finished taping off the woodwork and wall areas that I don't want to slop paint on (because I'm a crappy painter and I get it all over myself, the floor, and unintended wall spaces and the odd piece of personal property in the next room -- how does that happen?), I removed the faceplate to scrub it down. And discovered RED PAINT!
Notice where the grey paint is. The grey paint was applied (according to the paint can notation), in 2014. They painted with the grey AROUND the faceplate, did not remove the faceplate! At least whoever painted the kitchen dark red had removed the faceplate, LOL. And there is also a layer of a sort of goldish color underneath the red, that looks like it was done minus faceplate on wall as well.
Can you imagine an entire kitchen in dark red? Holy Hathor! Can you imagine someone either so inexperienced in painting, or so lazy, that they didn't remove the faceplate!
Okay - to the liquor store! Oops, I mean, grocery store, then liquor store.
We are in for another weekend snowstorm here so I'm keeping this brief because I've got to do two important errands (1) grocery shop and (2) hit the liquor store. We got about 7-8" last week over Friday/Saturday, and we're in for a rerun. Reruns already, geez.
I have started painting the areas in the kitchen where the drywall was patched! I should have done it sooner, of course - but I have to be in the "mood" and the "mood" to paint doesn't strike very often. It is not one of my favorite things to do.
Tell me, please, who DOES THIS:
More about THAT later.
I had dug out the supplies to paint the week before and found a scant amount of kitchen wall paint left in the basement. YAY! So everything has been sitting front and center on my breakfast bar area for more than a week staring at me every single day, taunting me. Yesterday, a nice sunny and bitterly cold and windy day with windchills dropping to 20 below zero, I figured it was time to start painting as I knew I would not be forcing myself to come up with anything else to avoid painting, not even a trip to the liquor store. Sigh.
So, I get the taping done and since I didn't have to tape off the ceiling, it went surprisingly quickly and no up and down my rickety old ladder. I had no excuses left. I got the paint can opened and saw there was maybe 3/8th of an inch of paint left at the bottom of the can. That wouldn't be enough to do the job. So, I did what any rational woman would do. I added water to thin the paint down. It hasn't been used in 2 years, after all, and could use some thinning. I poured in about 1/4 cup (I used a coffee cup that was nearby and added water to it) and stirred everything up thoroughly, giving both of my arms a good workout. I used a small sponge brush to do edges/edging and a small (4") sponge roller to paint rather than a full-size roller, which I knew would suck up the paint tremendously. I don't want to run out and have to make a trip to the big box store to buy a quart of matching paint. I think I have enough watered down grey paint to get the job done.
Even with 2 coats of primer the patched areas sucked up the paint, especially where the mud was applied thicker to try and smooth out the transition between the closed in doorway and existing walls. Close up, as I was rolling away with my tiny roller, I could see all kinds of flaws, but I wasn't about to stop and try and patch/fix/sand the problem areas myself! I'll save that for the time I repaint the kitchen - if that every happens (probably never). The fridge will cover up most of the flaws anyway and it's not like people go around staring at your walls from 3 or 4 inches away inspecting for flaws.
Because I was using the tiny roller, it probably took 2x as long as it would have using the regular sized roller, but I did get a lot of coverage out of relatively little paint as the sponge roller is more amenable to being squished against the wall to urge just a bit more paint out of the roller. There is more than enough paint still left to do a second and even third touch-up coats later today. Building up a couple of thin layers of paint will also help supply much needed "texture" to the new and sanded areas. The walls in this house have been painted several times over the years, and what I thought was an "orange peel" texture is actually, the painter/drywall mudder guy told me, just built up paint texture from multiple layers! Even after just one thin coat, however, I can see success staring me in the face, YAY! That serves as motivation to get this part of the project done.
Now, about that photo of a kitchen outlet near an area where new drywall was applied. I did not show myself removing the actual outlet faceplate. That's right. The dudes who did all the work on the drywall, mudding/sanding/priming -- never removed the faceplate! They mudded right around it! They primed right around it! Of course that got smush all over the thing, and like most men who are blind when it comes to such things, they made a half-hearted attempt at some point to wipe the smush off! Didn't work.
So, after I finished taping off the woodwork and wall areas that I don't want to slop paint on (because I'm a crappy painter and I get it all over myself, the floor, and unintended wall spaces and the odd piece of personal property in the next room -- how does that happen?), I removed the faceplate to scrub it down. And discovered RED PAINT!
Notice where the grey paint is. The grey paint was applied (according to the paint can notation), in 2014. They painted with the grey AROUND the faceplate, did not remove the faceplate! At least whoever painted the kitchen dark red had removed the faceplate, LOL. And there is also a layer of a sort of goldish color underneath the red, that looks like it was done minus faceplate on wall as well.
Can you imagine an entire kitchen in dark red? Holy Hathor! Can you imagine someone either so inexperienced in painting, or so lazy, that they didn't remove the faceplate!
Okay - to the liquor store! Oops, I mean, grocery store, then liquor store.
Friday, December 2, 2016
Kitchen Reno: Putting Stuff Together and Dragging a Heavy Box - Ugh!
Hola darlings!
Progress! I am nearly finished assembling the chairs. My poor hands. I am not as strong as I used to be, sadly, just a fact of getting older it seems, and my hands especially do not have the kind of strength they used to have, so turning an Allen key for what seems hours on end can be downright painful. I have resorted to cheating by using a pair of pliers to get extra torque. Three down - one to go!
Now, let me tell you about these chairs. As you can see, or not, since I am not the world's best photographer and I'm not even going to tell you how old and how few pixels or whatever they're called my digital camera has. It amazes me it still works actually, but it's a Nikon, it will probably outlive me. Anyway, I unboxed the chairs last night and pulled one out. I thought hmmmm, this is strange, as the chair just did not look like it was all that tall to me. It's supposed to be nearly 41" tall. The chair back and back legs are all attached in one long piece. So I pulled out my trusty tape measure and sure enough -- lucky if this chair is 38" tall at it's highest point at the top center of the chair! The measurements at Wayfair said 40.9" tall. Now I don't know about you, but I think that's rather a large difference in height, especially if one has a taller table! The table I'm using right now has a table-top height of nearly 34"! These chairs look like midgets next to it.
Mightily ticked off, I measured the other chair pieces. Seat measured 17.5" at its widest point, a full inch less than the 18.5" described at Wayfair for this model of chair. And the seat height - DON'T GET ME STARTED.
I nearly blew a gasket, I'll tell you that much. It is supposed to be 20". It is NOT. It is LESS. Fireworks erupted at Maison Newton last night, entertaining my neighbors for at least 15 minutes I then fired off a blistering "review" at the Wayfair website about the outright lies on the size/dimensions and color of this chair.
The COLOR! How on earth is light beige the equivalent of RICE PAPER? Here's a clue - it isn't. ARRRRGGGGGGHHHHHHHH!
The chair upholstery is nicely done, well stitched and seamed, a good sturdy and nicely textured fabric. But it isn't anywhere near the creamy to white-ish color I was expecting. I looked at photos of this chair on three different computers and on all three computers the chairs looked pretty darn white-ish. The chairs I received are not white-ish at all. I dug through the boxes and found the packing slips. They are described as "rice paper" in color. Great, just great!
On the plus side, the chairs arrived in excellent condition and other than painful hands and taking longer than the little amount of time most people bragged about spending putting these together at Wayfair's website in the reviews, they are great chairs and I got a great bargain on them. By the way, last night they were even less expensive (by $6 for four chairs) than the sale price I scored. So, I will keep them, and pray to the domestic Goddess Hera that the chair seats are just the right height for my new 30" tall table. It is just too much of a hassle to pack them all up and send them back. If they don't work, one of my newly married nephews will probably inherit them from "rich" Auntie Jan and I will not buy any chairs online, only in person and with tape measure in hand!
Then, about 6:15 p.m. in the pitch black darkness and drizzle last night, my doorbell rings. Lo and behold, it is Fedex and I'm thinking what the hell? I had received an email the day before from Amazon (where I ordered my table from) saying that the table had been delayed in transit and not to expect it yesterday. SURPRISE SURPRISE!
Fedex guy was nice enough to wheel the large box into my garage where it spent the night, in the cold and dark, poor baby. Today, taking a break from chair assembly duty, I determined to wrestle that box into the house, come hook or come crook.
Garage:
Driveway loaded with nut shells from my squirrelly pets. I've been busy and not sweeping daily, plus it was cold and damp today, not conducive to a good sweep outdoors.
Back stoop:
Three steps from driveway level into the back hall - that third step is a killer, let me tell you!
"Walking" the box from the garage to the stoop was easy enough. Leveraging the box up the first step, and from the first step to the second step, also relatively easy. The ancient Egyptians would be proud of me :)
Then, with some heavy lifting/heaving and tearing of the cardboard box (which would give way first, cardboard box or Jan's arms???), I got one end of the box up on the third step into the back hall!
Back hall and final step up into the kitchen:
Dummy moi, in my excitement in getting the humungous box almost into the house, I didn't use a piece of wood for leverage and I didn't move the rug out of the way. UGH! And the box kept getting stuck on the rubber seal that seals the outside drafts from coming into the house (that large yellowish looking strip just inside the threshold). I tugged. I pulled. I heaved. I tried lifting. Could not get that fricking box up that final step into the kitchen. I wasn't able to get a sufficiently good grip on the slippery outside of the cardboard box and I don't have enough arm strength to heave it. I needed more leverage.
As I toyed with the idea of dashing down to my mini junk-woodpile in the basement "shop" room (a convenient area put together by Mr. Former Owner), it occurred to me to try something easier. I grabbed a box cutter and made two slits, one on either side, lower on either side of the box, large enough to get my hands into. I heaved with all my might and the lip of the box topped the step and landed with a thud on the kitchen floor as I gasped for air! Okay, slight dramatic license there. I did gasp for air, however. Leverage, people. Leverage. Leverage is everything, in heaving heavy boxes as a single woman, and in the stock market too. Ta da!
Box in the house!
Um, yep, it's upside down. LOL! But I did get the right side facing out from the wall, hooray! Good grief. I might have a hard time believing it if somebody my age and size told me they'd heaved this damn big box that weights 84 pounds many feet across concrete from the garage up 4 steps into the house, all by herself. But there it is, folks, the damn box!
I am now having a couple well-deserved glasses of wine before finishing assembling the last of the chairs. Then, since I am the conquering Domestic Goddess of All, I may wrestle the Christmas tree up from the basement and rearrange the living room so I can set it up in front of the big picture window! I'm 2 weeks late getting it up as it is, eek!
Progress! I am nearly finished assembling the chairs. My poor hands. I am not as strong as I used to be, sadly, just a fact of getting older it seems, and my hands especially do not have the kind of strength they used to have, so turning an Allen key for what seems hours on end can be downright painful. I have resorted to cheating by using a pair of pliers to get extra torque. Three down - one to go!
Now, let me tell you about these chairs. As you can see, or not, since I am not the world's best photographer and I'm not even going to tell you how old and how few pixels or whatever they're called my digital camera has. It amazes me it still works actually, but it's a Nikon, it will probably outlive me. Anyway, I unboxed the chairs last night and pulled one out. I thought hmmmm, this is strange, as the chair just did not look like it was all that tall to me. It's supposed to be nearly 41" tall. The chair back and back legs are all attached in one long piece. So I pulled out my trusty tape measure and sure enough -- lucky if this chair is 38" tall at it's highest point at the top center of the chair! The measurements at Wayfair said 40.9" tall. Now I don't know about you, but I think that's rather a large difference in height, especially if one has a taller table! The table I'm using right now has a table-top height of nearly 34"! These chairs look like midgets next to it.
Mightily ticked off, I measured the other chair pieces. Seat measured 17.5" at its widest point, a full inch less than the 18.5" described at Wayfair for this model of chair. And the seat height - DON'T GET ME STARTED.
I nearly blew a gasket, I'll tell you that much. It is supposed to be 20". It is NOT. It is LESS. Fireworks erupted at Maison Newton last night, entertaining my neighbors for at least 15 minutes I then fired off a blistering "review" at the Wayfair website about the outright lies on the size/dimensions and color of this chair.
The COLOR! How on earth is light beige the equivalent of RICE PAPER? Here's a clue - it isn't. ARRRRGGGGGGHHHHHHHH!
The chair upholstery is nicely done, well stitched and seamed, a good sturdy and nicely textured fabric. But it isn't anywhere near the creamy to white-ish color I was expecting. I looked at photos of this chair on three different computers and on all three computers the chairs looked pretty darn white-ish. The chairs I received are not white-ish at all. I dug through the boxes and found the packing slips. They are described as "rice paper" in color. Great, just great!
On the plus side, the chairs arrived in excellent condition and other than painful hands and taking longer than the little amount of time most people bragged about spending putting these together at Wayfair's website in the reviews, they are great chairs and I got a great bargain on them. By the way, last night they were even less expensive (by $6 for four chairs) than the sale price I scored. So, I will keep them, and pray to the domestic Goddess Hera that the chair seats are just the right height for my new 30" tall table. It is just too much of a hassle to pack them all up and send them back. If they don't work, one of my newly married nephews will probably inherit them from "rich" Auntie Jan and I will not buy any chairs online, only in person and with tape measure in hand!
Then, about 6:15 p.m. in the pitch black darkness and drizzle last night, my doorbell rings. Lo and behold, it is Fedex and I'm thinking what the hell? I had received an email the day before from Amazon (where I ordered my table from) saying that the table had been delayed in transit and not to expect it yesterday. SURPRISE SURPRISE!
Fedex guy was nice enough to wheel the large box into my garage where it spent the night, in the cold and dark, poor baby. Today, taking a break from chair assembly duty, I determined to wrestle that box into the house, come hook or come crook.
Garage:
Driveway loaded with nut shells from my squirrelly pets. I've been busy and not sweeping daily, plus it was cold and damp today, not conducive to a good sweep outdoors.
Back stoop:
Three steps from driveway level into the back hall - that third step is a killer, let me tell you!
"Walking" the box from the garage to the stoop was easy enough. Leveraging the box up the first step, and from the first step to the second step, also relatively easy. The ancient Egyptians would be proud of me :)
Then, with some heavy lifting/heaving and tearing of the cardboard box (which would give way first, cardboard box or Jan's arms???), I got one end of the box up on the third step into the back hall!
Back hall and final step up into the kitchen:
Dummy moi, in my excitement in getting the humungous box almost into the house, I didn't use a piece of wood for leverage and I didn't move the rug out of the way. UGH! And the box kept getting stuck on the rubber seal that seals the outside drafts from coming into the house (that large yellowish looking strip just inside the threshold). I tugged. I pulled. I heaved. I tried lifting. Could not get that fricking box up that final step into the kitchen. I wasn't able to get a sufficiently good grip on the slippery outside of the cardboard box and I don't have enough arm strength to heave it. I needed more leverage.
As I toyed with the idea of dashing down to my mini junk-woodpile in the basement "shop" room (a convenient area put together by Mr. Former Owner), it occurred to me to try something easier. I grabbed a box cutter and made two slits, one on either side, lower on either side of the box, large enough to get my hands into. I heaved with all my might and the lip of the box topped the step and landed with a thud on the kitchen floor as I gasped for air! Okay, slight dramatic license there. I did gasp for air, however. Leverage, people. Leverage. Leverage is everything, in heaving heavy boxes as a single woman, and in the stock market too. Ta da!
Box in the house!
Um, yep, it's upside down. LOL! But I did get the right side facing out from the wall, hooray! Good grief. I might have a hard time believing it if somebody my age and size told me they'd heaved this damn big box that weights 84 pounds many feet across concrete from the garage up 4 steps into the house, all by herself. But there it is, folks, the damn box!
I am now having a couple well-deserved glasses of wine before finishing assembling the last of the chairs. Then, since I am the conquering Domestic Goddess of All, I may wrestle the Christmas tree up from the basement and rearrange the living room so I can set it up in front of the big picture window! I'm 2 weeks late getting it up as it is, eek!
Thursday, December 1, 2016
Kitchen Reno: Black Woodwork???
Hola darlings!
I wasn't going to post again today but what the heck. I have been watching the latest Property Brothers' adventure in New Orleans and last night watched the kitchen episode contest. Holy Hathor!
Fell madly in love with Drew's kitchen and its dark grey walls and dark backsplash, and all of the reclaimed wood accents - but loved the art work in Jonathan's kitchen and the black painted woodwork he did! Tres chic. I've been thinking about it ALL day.
This Atlanta home featured in Traditional Home (2011) just totally blew me away -- check out the color schemes in the family room and kitchen, WOWSERS!
I was planning on painting the woodwork in my kitchen white to match cabinets that will be painted white as part of Phase II of the Kitchen Reno, which will happen sometime early next year (but first I want to get new countertops). But after watching last night's Property Brothers, now I'm thinking I should just go for it and go dramatic with black wood trim and white cabinets. Will I? Hmmmm...
I wasn't going to post again today but what the heck. I have been watching the latest Property Brothers' adventure in New Orleans and last night watched the kitchen episode contest. Holy Hathor!
Fell madly in love with Drew's kitchen and its dark grey walls and dark backsplash, and all of the reclaimed wood accents - but loved the art work in Jonathan's kitchen and the black painted woodwork he did! Tres chic. I've been thinking about it ALL day.
This Atlanta home featured in Traditional Home (2011) just totally blew me away -- check out the color schemes in the family room and kitchen, WOWSERS!
I was planning on painting the woodwork in my kitchen white to match cabinets that will be painted white as part of Phase II of the Kitchen Reno, which will happen sometime early next year (but first I want to get new countertops). But after watching last night's Property Brothers, now I'm thinking I should just go for it and go dramatic with black wood trim and white cabinets. Will I? Hmmmm...
Kitchen Reno Construction Done - Finally! And - SHOPPING SHOPPING SHOPPING!
Woop woop! Hola everyone.
All the wood trim is up/completed, final layer of drywall mud sanded and the patches primed and ready to paint - done yesterday.
Now I have to get motivated to paint. Sigh. It's not fair, somehow -- when I had the energy to do all of this stuff I was working full-time plus running Goddesschess practically as a second full-time job after my day job, at night and on weekends. Now that I'm retired and have the time, I don't have that energy. LOL or cry. I choose to laugh.
During all the frustration of the drywall patching/mudding/sanding/priming not cooperating and wood trim issues, I did a lot of online window shopping. This wasn't part of the original plan but - oh well. I bought a new table, four new chairs, a new area rug for underneath, and today I bought a new light fixture to go above the table. Stop me now before I go bankrupt, please!
Actually, I scored amazing deals on everything, so I am very pleased. I've no idea for the present what to do with my 56" monster round table that fit beautifully in the former Maison Newton but here it is too massive for the space. Plus, I realized that I bought the set in 2001 - egoddess! - and while it is still in amazing condition, I've grown tired of the style and want something different, a little more modern/rustic-y mix, scaled down to better suit the size of this dining space and this home.
I managed to get the 4 chairs down to the basement rec room with rather surprising ease by sliding them backwards down the carpeted steps on their backs -- I know, sounds absolutely nutso but it WORKED! They look gigantically large in the dropped ceiling room but at least they're out of the way until I figure out if I can sell them or give the set to one of my nieces or nephews, but the table is beyond me, too large and too heavy. I am going to see if I can bribe my young neighbor's muscular hubby into getting he and one of his friends to take it apart and move it downstairs for me -- with baked goodies Lots of baked goodies. He's got a sweet-tooth :)
So, this is what things look like right now - a mess still but getting there!
Forgive the plastic sheeting stuffed under the table. I need to shake it off outside and fold it - it's the heavy-duty kind and perfectly good and did not get too much drywall dust on it, so I'm saving it for painting projects. Yes, I'mcheap frugal that way :)
Here is what is on the ceiling above the dining table at the moment:
It's humungous (nearly as large as the table!) and it's ugly. This came out of my bedroom where it was either the fan or my campaign style canopy bed (the bed won) and was installed in the dinette in place of an even uglier but equally large fan when I moved in July two years ago. I toyed with the idea of keeping a ceiling fan in the dinette for a long time, but in the end I decided nah, I just did not like anything I saw that combined a light with a ceiling fan. And with central air, I don't really need it.
Now, let me warn you in advance. I was thinking "buy something sleek and modern." Something in chrome or polished nickel to go with the new hardware I bought for my cabinets (to be installed after cabinets are painted). So, what did I do? After days and days of looking and looking at dozens of different sites and dozens of websearches, TA DA!
Okay, take me out and shoot me now. NOT MODERN, NOT CHROME OR POLISHED NICKEL. NOT SLEEK. It has CRYSTALS, for Pete's sake! It is by Feiss and described as an "antique silver" candelabra chandelier, LOL! The crystals are actually clear glass and smokey rock crystal - and only three arms. It is 20" tall and 19" wide, so a little less wide than the up-to-22" that I was looking for. But what can I say? It was love at first sight. Honestly. One look and I was totally smitten. And it could not be more different than the chandelier I had envisioned than how equally different it is from the clunky and too large ceiling fan light it will be replacing.
Cost (at DealYard): $59.95, no sales tax added and free shipping. What's not to love about that?
New table:
This is by Powell, the Franklin dining table, 45" round with under-shelf, mixes oak wood veneer rustic finish and metal legs with nail-head trim around the table apron. I won't have to hide an easily scratched MDF smooth table top with this baby and if I don't like the color I'll be able to easily whitewash the wood veneer. Sort of rustic-chic/industrial. Something I would never have considered back in 2001 for sure, LOL! Maybe the style didn't even exist in 2001...
Cost (at Amazon): $213.30 (no sales tax added) and free shipping. I'll still be able to comfortable seat 4.
New chairs:
This is the Redfield nailhead chair in "white rice paper" textured linen-look Poly blend in a sleek Parson's design, just under 41" tall, 20" seat height, 18.5" seat width. Amazingly, these dimensions aren't that much different than my 2001 dining chairs, but they couldn't be more different in style and footprint.
Cost (from Wayfair): $106.99 a pair (2 pair purchased) for a total of $213.98, no sales tax added and free shipping.
New area rug:
I was looking for a round rug and, true to form, ended up purchasing a square rug instead. New rug:
This is from the Amherst collection by Safavieh, indoor/outdoor in cream and light grey, 7 foot square. I prefer to use indoor/outdoor rugs in this room because I use the side entrance off the driveway into the basement landing that houses the basement stairs and doorless entrance into this room. It also opens through the slider to the patio. So I'm constantly tracking stuff into this room, especially from the patio for most of three seasons. The present rug is also indoor/outdoor and I love it for it's ease of care and hard-wearing nature. This will give me a chance to swap out the look. The square rug has a more "elegant" feel to its pattern, I think.
Cost (from Amazon): $142.89 (including sales tax) and free shipping.
Total cost for room decor: $630.12.
The new chairs arrived Tuesday evening via UPS. I will attempt to put them together today :)
That's it for now. I want to get cracking on this room because I haven't begun to decorate for Christmas. Normally my tree would be up and fully decorated by now, eek!
All the wood trim is up/completed, final layer of drywall mud sanded and the patches primed and ready to paint - done yesterday.
Now I have to get motivated to paint. Sigh. It's not fair, somehow -- when I had the energy to do all of this stuff I was working full-time plus running Goddesschess practically as a second full-time job after my day job, at night and on weekends. Now that I'm retired and have the time, I don't have that energy. LOL or cry. I choose to laugh.
During all the frustration of the drywall patching/mudding/sanding/priming not cooperating and wood trim issues, I did a lot of online window shopping. This wasn't part of the original plan but - oh well. I bought a new table, four new chairs, a new area rug for underneath, and today I bought a new light fixture to go above the table. Stop me now before I go bankrupt, please!
Actually, I scored amazing deals on everything, so I am very pleased. I've no idea for the present what to do with my 56" monster round table that fit beautifully in the former Maison Newton but here it is too massive for the space. Plus, I realized that I bought the set in 2001 - egoddess! - and while it is still in amazing condition, I've grown tired of the style and want something different, a little more modern/rustic-y mix, scaled down to better suit the size of this dining space and this home.
I managed to get the 4 chairs down to the basement rec room with rather surprising ease by sliding them backwards down the carpeted steps on their backs -- I know, sounds absolutely nutso but it WORKED! They look gigantically large in the dropped ceiling room but at least they're out of the way until I figure out if I can sell them or give the set to one of my nieces or nephews, but the table is beyond me, too large and too heavy. I am going to see if I can bribe my young neighbor's muscular hubby into getting he and one of his friends to take it apart and move it downstairs for me -- with baked goodies Lots of baked goodies. He's got a sweet-tooth :)
So, this is what things look like right now - a mess still but getting there!
Forgive the plastic sheeting stuffed under the table. I need to shake it off outside and fold it - it's the heavy-duty kind and perfectly good and did not get too much drywall dust on it, so I'm saving it for painting projects. Yes, I'm
Here is what is on the ceiling above the dining table at the moment:
It's humungous (nearly as large as the table!) and it's ugly. This came out of my bedroom where it was either the fan or my campaign style canopy bed (the bed won) and was installed in the dinette in place of an even uglier but equally large fan when I moved in July two years ago. I toyed with the idea of keeping a ceiling fan in the dinette for a long time, but in the end I decided nah, I just did not like anything I saw that combined a light with a ceiling fan. And with central air, I don't really need it.
Now, let me warn you in advance. I was thinking "buy something sleek and modern." Something in chrome or polished nickel to go with the new hardware I bought for my cabinets (to be installed after cabinets are painted). So, what did I do? After days and days of looking and looking at dozens of different sites and dozens of websearches, TA DA!
Okay, take me out and shoot me now. NOT MODERN, NOT CHROME OR POLISHED NICKEL. NOT SLEEK. It has CRYSTALS, for Pete's sake! It is by Feiss and described as an "antique silver" candelabra chandelier, LOL! The crystals are actually clear glass and smokey rock crystal - and only three arms. It is 20" tall and 19" wide, so a little less wide than the up-to-22" that I was looking for. But what can I say? It was love at first sight. Honestly. One look and I was totally smitten. And it could not be more different than the chandelier I had envisioned than how equally different it is from the clunky and too large ceiling fan light it will be replacing.
Cost (at DealYard): $59.95, no sales tax added and free shipping. What's not to love about that?
New table:
This is by Powell, the Franklin dining table, 45" round with under-shelf, mixes oak wood veneer rustic finish and metal legs with nail-head trim around the table apron. I won't have to hide an easily scratched MDF smooth table top with this baby and if I don't like the color I'll be able to easily whitewash the wood veneer. Sort of rustic-chic/industrial. Something I would never have considered back in 2001 for sure, LOL! Maybe the style didn't even exist in 2001...
Cost (at Amazon): $213.30 (no sales tax added) and free shipping. I'll still be able to comfortable seat 4.
New chairs:
This is the Redfield nailhead chair in "white rice paper" textured linen-look Poly blend in a sleek Parson's design, just under 41" tall, 20" seat height, 18.5" seat width. Amazingly, these dimensions aren't that much different than my 2001 dining chairs, but they couldn't be more different in style and footprint.
Cost (from Wayfair): $106.99 a pair (2 pair purchased) for a total of $213.98, no sales tax added and free shipping.
New area rug:
I was looking for a round rug and, true to form, ended up purchasing a square rug instead. New rug:
This is from the Amherst collection by Safavieh, indoor/outdoor in cream and light grey, 7 foot square. I prefer to use indoor/outdoor rugs in this room because I use the side entrance off the driveway into the basement landing that houses the basement stairs and doorless entrance into this room. It also opens through the slider to the patio. So I'm constantly tracking stuff into this room, especially from the patio for most of three seasons. The present rug is also indoor/outdoor and I love it for it's ease of care and hard-wearing nature. This will give me a chance to swap out the look. The square rug has a more "elegant" feel to its pattern, I think.
Cost (from Amazon): $142.89 (including sales tax) and free shipping.
Total cost for room decor: $630.12.
The new chairs arrived Tuesday evening via UPS. I will attempt to put them together today :)
That's it for now. I want to get cracking on this room because I haven't begun to decorate for Christmas. Normally my tree would be up and fully decorated by now, eek!
Tuesday, November 29, 2016
Kitchen Reno: Into Week Three and Still Not Done!
ARRRRGGGGHHHHHH!
Drywall patching is a word that starts with B and rhymes with WITCH. It seems the painter/drywaller brought in by my contractor to mud and prime the drywall patches thought his job was finished after 3 coats of mud, a sanding and priming.
Not.
Divets and dings in mud not caused by anything I did, areas that clearly to my untrained eye need more mudding and uneven sanding to smooth out transitions between the existing drywall and new patches, as well as unresolved "waves" in the mudding (not sure how else to describe them and they don't photograph so I can show you clearly what I'm seeing) --
The whole job should have been completed the Friday before Thanksgiving week. All the guys took off for deer hunting up north, the opening of gun hunting season in Wisconsin. Guess it was too much to think the job should have been finished right BEFOREthe crew took off for deer hunting. But not in Wisconsin. Maybe not anywhere, LOL. It's like a sacred ritual or something.
ANYWAY. The following Monday contractor guy appears to begin re-installing woodwork and also trouble-shoot the problematic transition between dining area flooring and the living room carpet, at about 3/4ths inch different heights. He had to create his own transition threshold to fill the opening created between the two spaces by the removal of the wall because it's so wide and that was the fastest solution to solving the problem. It works - sort of.
I showed contractor guy the relatively few issues with the drywall and he said he would call the painter/drywaller guy, who was supposed to call me to check on whether I was satisfied with the job (he did not call). Contractor guy agreed more mudding and sanding needed to be done, possibly another 2 or 3 coats. Another week of work, depending on how quickly the mud coats dry.
Contractor guy arrives the next day to install more woodwork and also the completed custom threshold. Guess what -- the new woodwork doesn't marry correctly with the existing old woodwork because the old woodwork is thicker. I have to laugh, I can't cry about it! So. contractor guy says no problem, I will replace the rest of this (a long stretch down the hallway wall to the bathroom door) with new woodwork so it all blends in.
He also told me that he had spoken with the painter/drywall guy and that he - contractor guy - would be finishing the mudding/sanding as needed to make sure the patches look as good as we can get them.
So - I had my Thanksgiving in a torn-apart house that is STILL not finished after more than 3 weeks to close up one simple doorway opening and open one simple doorway between two rooms. Bloody Damn Hell. I could have done it myself with my bare hands in this amount of time. My hands, nails, and some spit.
My custom for many years has been to put up my Christmas tree and start Christmas decorations on Thanksgiving weekend. Not this year. Today - November 29th, contractor guy got tied up on another job and was not able to come to finish. And frankly, I doubt he will be able to finish for at least 2 more days. He has to still sand what I hope was a final coat of drywall mud he put on yesterday and also finish installing all of the new woodwork trim. Prime the sanded drywall patched areas and stain the new woodwork. Rutsa ruck.
I shopped online until I dropped to spend some of my frustration over the past few weeks. More on that in post above this one.
Drywall patching is a word that starts with B and rhymes with WITCH. It seems the painter/drywaller brought in by my contractor to mud and prime the drywall patches thought his job was finished after 3 coats of mud, a sanding and priming.
Not.
Divets and dings in mud not caused by anything I did, areas that clearly to my untrained eye need more mudding and uneven sanding to smooth out transitions between the existing drywall and new patches, as well as unresolved "waves" in the mudding (not sure how else to describe them and they don't photograph so I can show you clearly what I'm seeing) --
The whole job should have been completed the Friday before Thanksgiving week. All the guys took off for deer hunting up north, the opening of gun hunting season in Wisconsin. Guess it was too much to think the job should have been finished right BEFOREthe crew took off for deer hunting. But not in Wisconsin. Maybe not anywhere, LOL. It's like a sacred ritual or something.
ANYWAY. The following Monday contractor guy appears to begin re-installing woodwork and also trouble-shoot the problematic transition between dining area flooring and the living room carpet, at about 3/4ths inch different heights. He had to create his own transition threshold to fill the opening created between the two spaces by the removal of the wall because it's so wide and that was the fastest solution to solving the problem. It works - sort of.
I showed contractor guy the relatively few issues with the drywall and he said he would call the painter/drywaller guy, who was supposed to call me to check on whether I was satisfied with the job (he did not call). Contractor guy agreed more mudding and sanding needed to be done, possibly another 2 or 3 coats. Another week of work, depending on how quickly the mud coats dry.
Contractor guy arrives the next day to install more woodwork and also the completed custom threshold. Guess what -- the new woodwork doesn't marry correctly with the existing old woodwork because the old woodwork is thicker. I have to laugh, I can't cry about it! So. contractor guy says no problem, I will replace the rest of this (a long stretch down the hallway wall to the bathroom door) with new woodwork so it all blends in.
He also told me that he had spoken with the painter/drywall guy and that he - contractor guy - would be finishing the mudding/sanding as needed to make sure the patches look as good as we can get them.
So - I had my Thanksgiving in a torn-apart house that is STILL not finished after more than 3 weeks to close up one simple doorway opening and open one simple doorway between two rooms. Bloody Damn Hell. I could have done it myself with my bare hands in this amount of time. My hands, nails, and some spit.
My custom for many years has been to put up my Christmas tree and start Christmas decorations on Thanksgiving weekend. Not this year. Today - November 29th, contractor guy got tied up on another job and was not able to come to finish. And frankly, I doubt he will be able to finish for at least 2 more days. He has to still sand what I hope was a final coat of drywall mud he put on yesterday and also finish installing all of the new woodwork trim. Prime the sanded drywall patched areas and stain the new woodwork. Rutsa ruck.
I shopped online until I dropped to spend some of my frustration over the past few weeks. More on that in post above this one.
Monday, November 14, 2016
Kitchen Reno: End of Work Day 1
All the wood trim on baseboards was removed and saved for re-use/patching as needed.
Wall between the living room and dining area was cut to the floor; framing reinforced.
Original entrance framed in. Drywall up!
Tomorrow the painter/drywaller will arrive to put a first coat of mud on the drywall, and be back in the afternoon to apply a second coat (assuming the first coat dries). Now I understand why the work is going to take all week - the mudding/sanding that needs to be done. Didn't think about that before, duh!
Third coat of mud and possibly final sanding will be done on Wednesday. No work scheduled for Thursday. Everything finished up on Friday, including patching floor, adding transition between the dining area and living room, trimming out the baseboards, and priming the drywall (I have paint matched to existing colors and will do that myself).
As with any remodeling, a few surprises were discovered, including a hidden junction box (code no-no) that was then disconnected and removed, and the fact that the prior owner added approximately 1/2" of height to the kitchen and dining area floor by adding a new layer of plywood over the prior floor surface before putting down the current flooring! So my contractor is going to custom mill a transition threshold to fit the space between the dining area and the carpeted living room. That will stay in place until I replace the kitchen/dinette flooring and have the carpeting removed and hardwood floors refinished in the living room and hallway, the only areas where it remains on the main floor.
The guys are cleaning up right now (1:42 p.m.); they worked straight-through from 8:00 a.m.
I will give everything a wipe-down after I eat something - I'm starving! More pics:
| Height difference between kitchen floor (dark) and living room (carpeted): 1/2 inch. New threshold will be sandwiched between and tapered. |
I didn't do a thing and I'm exhausted - what's up with that? LOL!
Kitchen Reno!!!
Hola everyone! It has been a little while since I last posted, and I have been uber-busy with the garden, the yard, the Shezebo, the new privacy fence along the north lot line, and now, fall clean-up, which will end about next May. And now, I am undertaking a reno project, my first - ever!
Ever since I moved into my retirement Maison Newton in July 2014, I've been wanting to open up the "window" that exists between the living room and my dinette area of the kitchen, and close off the existing doorway to the hall that leads to the bedrooms and bathroom. Closing off the existing doorway will give me room in the kitchen proper to slide my fridge over next to the existing cabinets and free-up space across from the peninsula and the dining area, while also giving me a more open traffic flow.
In the current arrangement the fridge is sitting in space that normally would be considered part of the dining area of the kitchen, and even though my fridge is Euro-style sleek, narrow and counter-depth it has always looked out of place to me, sort of stuck in a no-man's land between the kitchen and the dining area. Here are some photos which show the less-than-optimum arrangement of the space:
Two of the identical floor-plan homes that I looked at before I bought this home had been remodeled so that the wall between dining area and living room was opened up and the former doorway to the kitchen off the hallway closed up. The result was a modern-looking open space and flow between the kitchen/dinette and living room areas. Here are a couple of photos of one of the houses where the wall was opened and how that looks:
And so, after much thinking about it and hemming/hawing, I decided to go ahead with a phased kitchen re-do that will, eventually, include a new countertop, new blacksplash, painted cabinets, new flooring, new cabinet hardware, and new light fixtures. Eventually also a new range, dishwasher and microwave to go from black to stainless steel.
Phase I is opening up the wall between the dining area and living room and closing off the existing doorway. The current "window" that is cut into the dinette/living room wall will be opened all the way to the floor and widened about 12 to 15 inches, depending upon stud location. Today is the FIRST DAY!
Three guys are here and taped off the living spaces to contain the construction dust as much as possible, covered the carpeting with plastic and dropcloths; electrical outlets have already been moved and an inconveniently placed cold air return removed; they have also removed the woodwork in the construction area and have already cut the wall down to the floor! Now they are working on relocating the electrical outlets.
Not sure how long they will be here today; originally the contractor told me they would be here all week, so I don't imagine they will be working 8-hour days for 5 days, not when the work is already progressing so quickly!
I am presently holed up in my den, which I somewhat cleaned up yesterday, knowing I would be working in here all week :) It is amazing what an impending eviction from my dinette table (where I normally sit, looking out over my backyard through the patio doors) can do to motivate me to attack my messy den. It is now, at least, livable. Eventually I will get around to finishing the taping I started in January (yes, in January), and repaint these dark and dreary walls!
Ever since I moved into my retirement Maison Newton in July 2014, I've been wanting to open up the "window" that exists between the living room and my dinette area of the kitchen, and close off the existing doorway to the hall that leads to the bedrooms and bathroom. Closing off the existing doorway will give me room in the kitchen proper to slide my fridge over next to the existing cabinets and free-up space across from the peninsula and the dining area, while also giving me a more open traffic flow.
In the current arrangement the fridge is sitting in space that normally would be considered part of the dining area of the kitchen, and even though my fridge is Euro-style sleek, narrow and counter-depth it has always looked out of place to me, sort of stuck in a no-man's land between the kitchen and the dining area. Here are some photos which show the less-than-optimum arrangement of the space:
Two of the identical floor-plan homes that I looked at before I bought this home had been remodeled so that the wall between dining area and living room was opened up and the former doorway to the kitchen off the hallway closed up. The result was a modern-looking open space and flow between the kitchen/dinette and living room areas. Here are a couple of photos of one of the houses where the wall was opened and how that looks:
And so, after much thinking about it and hemming/hawing, I decided to go ahead with a phased kitchen re-do that will, eventually, include a new countertop, new blacksplash, painted cabinets, new flooring, new cabinet hardware, and new light fixtures. Eventually also a new range, dishwasher and microwave to go from black to stainless steel.
Phase I is opening up the wall between the dining area and living room and closing off the existing doorway. The current "window" that is cut into the dinette/living room wall will be opened all the way to the floor and widened about 12 to 15 inches, depending upon stud location. Today is the FIRST DAY!
Three guys are here and taped off the living spaces to contain the construction dust as much as possible, covered the carpeting with plastic and dropcloths; electrical outlets have already been moved and an inconveniently placed cold air return removed; they have also removed the woodwork in the construction area and have already cut the wall down to the floor! Now they are working on relocating the electrical outlets.
Not sure how long they will be here today; originally the contractor told me they would be here all week, so I don't imagine they will be working 8-hour days for 5 days, not when the work is already progressing so quickly!
I am presently holed up in my den, which I somewhat cleaned up yesterday, knowing I would be working in here all week :) It is amazing what an impending eviction from my dinette table (where I normally sit, looking out over my backyard through the patio doors) can do to motivate me to attack my messy den. It is now, at least, livable. Eventually I will get around to finishing the taping I started in January (yes, in January), and repaint these dark and dreary walls!
Subscribe to:
Posts (Atom)